
How to Dive as a Goalkeeper: Step-by-Step
This post contains affiliate links. As an Amazon Associate, we earn from qualifying purchases.
To dive as a goalkeeper, you initiate a power step with the foot nearest the ball to transfer bodyweight, collapse at the knees into the “K” position for low saves, and lead with your hands in a “handcuffs” formation to secure the ball. A 2019 biomechanics study found the fastest dive comes from a starting stance width of 75% of your leg length, not the traditional shoulder-width stance, cutting your movement time by crucial hundredths of a second.
That detail about stance width is a complete rewrite of the setup most keepers have drilled for years, originating from a lab with force plates and elite subjects rather than a training-ground hunch. Understanding how to dive as a goalkeeper is critical because the difference between a goal and a save on a penalty, where the ball travels in about 600 milliseconds, can be less than the blink of an eye.
The rest of this guide walks you through the exact mechanics that turn that setup into a save when learning how to dive as a goalkeeper, using the official technical manuals from The Football Association and FIFA. We’ll break down the low dive, the high dive, and the attacking dive, show you where the science contradicts the traditional coaching, and give you the drills to build the muscle memory that works when your brain is just reacting.
Key Takeaways
- The biomechanically optimal stance width for a diving save is 75% of your leg length, as found by a 2019 study, not the generic “shoulder-width apart” advice.
- For a low save, collapse at the knees to the ‘K’ position and lead with your hands in the “handcuffs” formation, about a ball’s width apart.
- The power step with the nearest foot initiates the dive, transferring your weight forward so your hands and body follow through the line of the ball.
- Practice recovery saves and recover lines as part of the technique, the save isn’t done until you’ve either secured the ball or regained your goal-line position.
- Low dives are significantly faster than high dives; from the optimal stance, study participants averaged 0.972 seconds for low balls versus 1.050 seconds for high ones.
The Foundational Stance: 75% Rule vs. Shoulder-Width
You can’t dive well if you start wrong. And for decades, the coaching mantra has been simple: stand shoulder-width apart, knees slightly bent, be ready. It’s clean, it’s memorable, and according to a peer-reviewed study, it’s sub-optimal.
The 2019 study published in Frontiers in Sports and Active Living concluded that a starting stance width of 75% of a goalkeeper’s leg length (condition SW75) produced the fastest dive movement time. The researchers stated that diving from a position with a wider stance width than the preferred one “leads to shorter movement time, and a faster and more direct center of mass trajectory toward the ball.”
That’s not a small-sample fluke. Ten elite goalkeepers were tested diving from various imposed postures. Their natural, preferred stance was about 33% of their leg length. When they adopted the 75% width, their dives got faster. The study’s authors are explicit: the preferred posture is “sub-optimal for performance.” This is the kind of specific, sourced number that reshapes goalkeeper positioning fundamentals.
Here’s the physical why-layer: a wider base better orients your contralateral leg, the leg opposite your dive direction, to push off and generate horizontal force. In the optimal SW75 posture, the center of mass reached a horizontal velocity of 1.43 m·s⁻¹ during the push-off for a high dive. From the narrower preferred stance, it was significantly slower. That extra burst gets your body moving laterally quicker, which is everything when reacting to a fast shot.
| Stance Type | Width (vs. Leg Length) | Source | Performance Outcome |
|---|---|---|---|
| Biomechanically Optimal | 75% | van den Tillaar et al. (2019) | Fastest dive movement time; more efficient center-of-mass path. |
| Elite Keeper’s Natural Preference | 33% | van den Tillaar et al. (2019) | Characterized as sub-optimal by the study’s own conclusion. |
| Traditional Coaching Cue | “Shoulder-width apart” | The FA & FIFA Training Centre | Lacks precise measurability but provides a general ready position. |
So what should you do? First, measure your leg length. Mark 75% of that distance. Get in your stance and feel the difference. It will feel wide, maybe awkward. For the optimal diving posture (SW75) that produced the fastest movement, the study recorded a knee flexion angle of ~55°. This stance isn’t about comfort; it’s about creating a platform for explosion. It’s the first, quiet revolution in the noisy, reactive world of goalkeeper improvement.
The Anatomy of a Low Diving Save
Most shots are driven low or skid along the turf, rather than being top-corner screamers. The technique here is less about soaring and more about collapsing your body around the ball’s path. The FA manual calls it the “scoop” or “low diving save,” and it starts with a decision: can you step into the line of the ball?
If you can, here’s the sequence, verbatim from the manual:
- Step towards the line of the ball with the nearest foot. This is the power step. It shifts your weight forward onto that slightly bent leg.
- Collapse at the knees to the “K” position. Don’t just fall sideways. Drive your knees down and towards the ball, getting your body behind the line.
- Lead with your hands in the “handcuffs” formation. Your hands should be approximately a ball’s width apart, fingers spread, moving together. Think of it as your wrists being cuffed together.
- Secure the ball. If it’s on the ground, The Football Association (FA) advises the leading hand goes behind it with the other securing it on top, while the FIFA Training Centre states firm handling can be achieved with one hand behind the ball and the other on top. The FA specifies: “The elbow needs to be tucked in to secure the ball safely and avoid injury.”
- Take the impact on your side and shoulder. Your body follows your hands. Keep your head still, eyes on the ball until it’s tucked into your chest. All impact is taken on the side of the body and the shoulders.
The sensory cue here is sound and feel. A low save onto soft ground is a controlled thud, your side and shoulder absorb it. On a harder pitch, you’ll feel the jolt travel up your side, which is why tucking that elbow is essential. Leave it flared and you’re risking a painful, hyperextended smack against the turf.
Where this goes sideways: Leading with your head or shoulder instead of your hands. You’ll hear a hollow whump as your torso hits first, the ball will squirt loose, and you’re now on the ground with a potential rebound to deal with. Your hands must win the race.
The FIFA Training Centre adds a crucial edge case: “One-handed saves are possible if the ball is too far.” Sometimes, stretching with one hand to parry is the only option. Their drill for this starts with the keeper on one knee, eyes closed, to build the feeling of pushing off the standing foot for maximum reach. This kind of focused reaction training builds the explosive base the technique relies on.
Executing a High or Aerial Dive
When the ball is headed for the top corner, the dive becomes a launch. The sequence is similar, but the body mechanics shift from a collapse to a projection. Your goal is to get your hands to the ball’s height and line, often requiring you to leave your feet entirely.
According to the FA manual for a high diving save:
- The eyes are focused on the ball between the flexed elbows. As you drive off, your arms are already up and bent, framing your view.
- The power step and weight transfer are more pronounced. You need that contralateral leg push to generate upward and lateral momentum.
- The hand position shifts from “scoop” to “deflect or parry.” At full stretch, you might not be able to catch cleanly. The technique of “deflecting to safe areas – Strong wrists – Big palm” takes over.
The FIFA Training Centre drills emphasize the footwork to generate power. For a high ball, “the goalkeeper must palm the ball away with their right hand if it is far away and their left hand if it is high.” This isn’t arbitrary. Using the right hand for a far-away ball allows for a stronger, more extended reach across the body, while the left hand for a high ball on that side provides better control when the arm is naturally raised. Their progression starts with simple jumps from the center of the goal, focusing on using both feet to spring and “stretching with a firm and open palm.”
The timing surprise from the science on how to dive as a goalkeeper is stark: low dives are significantly faster than high dives. From the optimal SW75 stance, the 2019 study recorded an average dive time of 0.972 seconds for low balls versus 1.050 seconds for high ones. That 78-millisecond gap is why coaches scream about staying on your feet as long as possible, the moment you commit to a full aerial launch, the sequence simply takes longer. Training for high dives, therefore, is about maximizing the power of your explosive movement to minimize that inherent time penalty.
The Attacking Dive: Closing the Angle
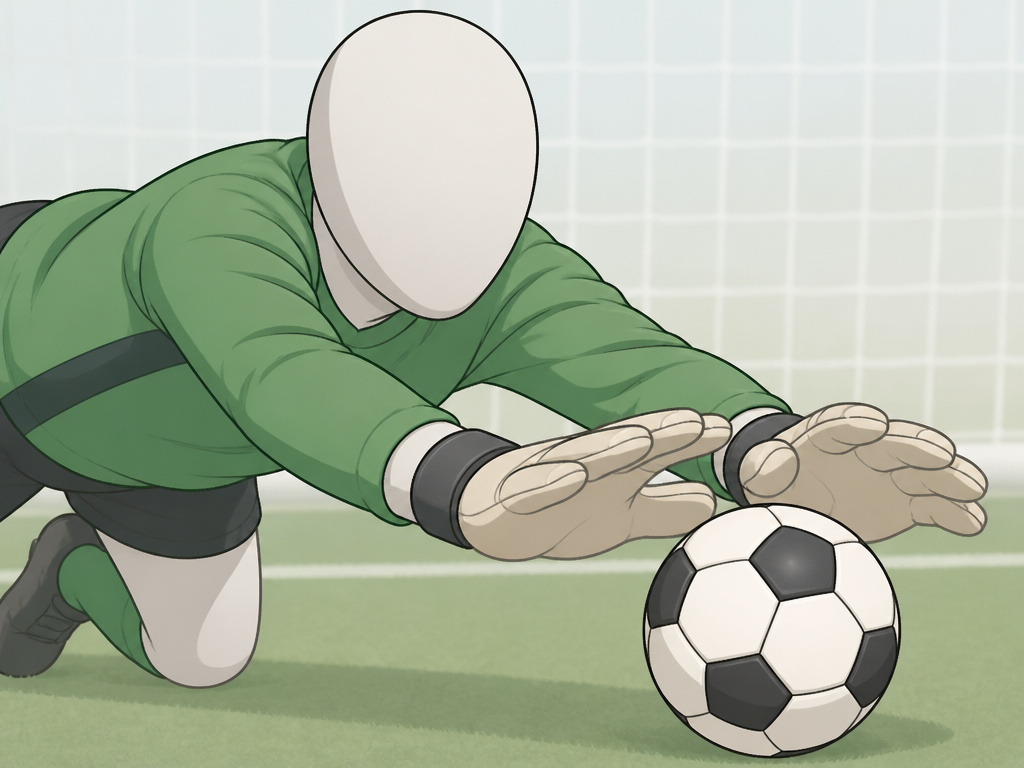
This is the proactive dive. It’s not for a shot that’s already past you; it’s for closing down an attacker in a 1v1, smothering a ball played across the six-yard box, or intercepting a low cross. The FIFA Training Centre frames it as “attacking the space in front.”
The starting position is different. One of their key drills begins with the goalkeeper on both knees, 1 metre from the goal line, with a slightly bent upper torso. The idea is to remove the complexity of footwork and isolate the core action: launching the upper body forward to claim space.
- Bring the knee closest to the ball forward. From the kneeling start, this initiates the lunge.
- Lead out with both hands facing downward, upper body moving forward and down. You’re not reaching up; you’re spearing out, like a fielder sliding to stop a ground ball.
- Push the whole body forward to dive and make firm contact with the ball with both palms. The objective is to get your hands to the ball before the attacker’s feet do.
Common mistake: Staying upright. The drill starting on knees forces a low, attacking posture. In a game, if you stay tall in a 1v1, you give the striker more visible goal to aim at. The attacking dive is about shrinking the target by filling the space.
As the drill progresses, you start from one knee and one standing foot. Here, “the dive starts with the standing foot pushing off, the arms swinging back to gain momentum, and the upper body attacking the space in front.” That arm swing is critical, it’s a conscious gathering of power before the explosive forward thrust. The final stage adds a cognitive layer: reacting to a coloured cone shown by the coach and coordinating the correct foot to push off with. It’s all about marrying decision-speed with techniques for crosses and close-range attacks.
Recovery: The Save Isn’t Over When You Land

A great dive that ends with the ball bouncing back into play is a half-measure. The FA manual is explicit about the next phase, dividing it into two clear decisions:
- Recovery saves: To gather the ball if it comes off the goalkeeper.
- Recover lines: To defend the goal if that is the better option.
You must practice getting up. Fast. The moment you secure a low ball, your immediate instinct should be to roll onto your stomach and push up to your knees, scanning for threats. If you’ve parried it, you need to be on your feet and repositioning toward your near post before the opponent can react. This isn’t an afterthought; it’s the final, critical step of the technique. Including this in your goalkeeper agility exercises builds the endurance and habit for it.
Consider this: the study’s recorded dive times are to first contact. The ball isn’t necessarily held. Your training isn’t complete until you’ve drilled the scramble, the second-effort save, and the decision to either secure the loose ball or bolt back to your line. It’s the difference between being a shot-stopper and a goalkeeper who commands his area.
Drills to Build Diving Technique and Confidence
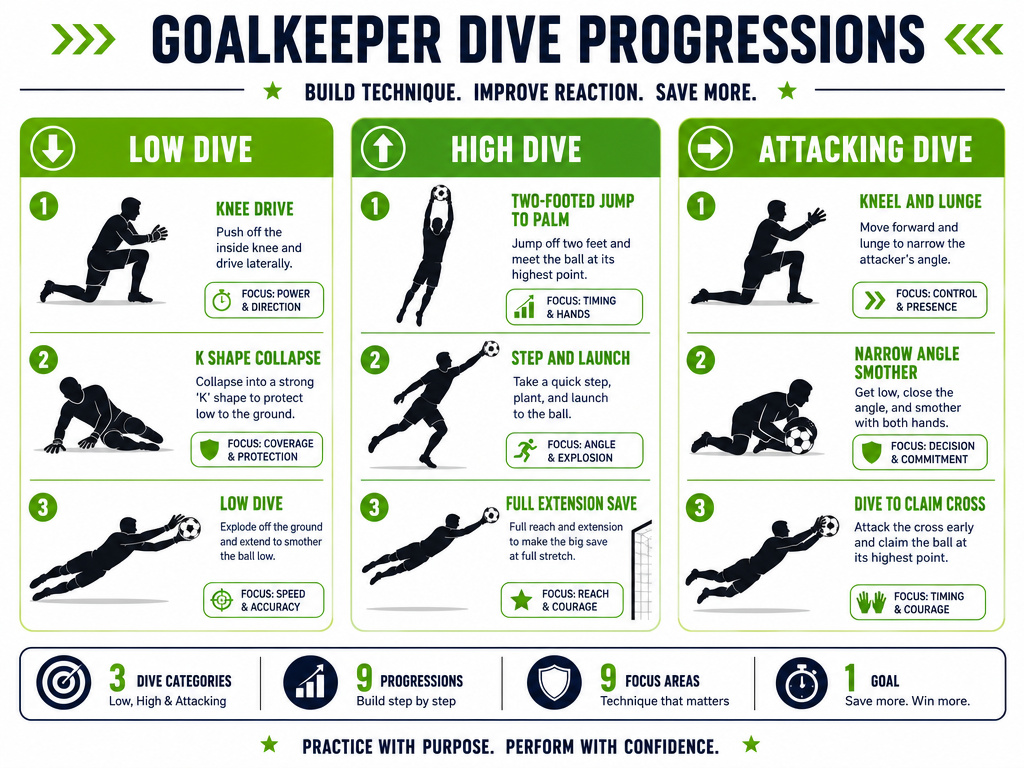
Theory is useless without the sweat to back it up. Here are progressions drawn directly from the FIFA Training Centre and FA principles, designed to build from isolation to game-like intensity.
Low Dive Progression:
- Knee-Drop Drill (FIFA): Start on one knee, other foot planted, eyes closed. A server rolls a ball to your side. Focus on the feeling of pushing off the standing foot and extending the near hand. Builds sensitivity and explosive push from a static position.
- The “K” Position Collapse: From a ready stance, have a server call “down” and practice collapsing your knees into the side-lying “K” position without a ball. Add a stationary ball to secure. Focus on the smooth transfer from step, to collapse, to secure.
- Reaction Low Dives: Start in your SW75 stance. A server, from a short distance, hits low balls to either side. Concentrate on the power step and a clean handcuffs catch. This directly trains the reflexes and technique together.
High Dive Progression:
- Plyometric Jump to Palm (FIFA): In goal, bounce on your toes. Server throws a high ball to a corner. Use a two-footed jump and practice cleanly palming the ball over the bar or to a safe area. Focus on the strong, open palm and full extension.
- Step-and-Launch: Start central. Server points left or right. Take one explosive step in that direction and launch into a high dive for a ball thrown just beyond reach. Integrates the footwork component.
- Penalty Reaction: Use the SW75 stance. Have servers take penalties or hit firm shots to the corners. The focus is on combining your optimal starting posture with the full high-dive technique under pressure, tying directly into the psychology of penalty saves.
Attacking Dive Progression:
- Kneeling Attack (FIFA): Start on both knees 1m out. Server rolls a ball slightly to either side. Practice the lunge-forward, hands-down technique to smother it. Isolates the upper-body attack.
- 1v1 Narrow-Angle: In a reduced-width goal, an attacker starts with the ball a short distance out. Your job is to close the angle and attack the ball at their feet. Starts to train the decision-making of when to commit.
- Crossing Smother: Have a winger play low, driven crosses across the goal mouth. Practice reading the flight, timing your forward dive, and securing the ball before a (passive) attacking runner arrives. This is the game-speed application of the technique.
Common Diving Mistakes and How to Fix Them
Watch any grassroots game and you’ll see these errors repeated. They’re the difference between a clean save and a goal, or worse, an injury.
| Mistake | What It Looks/Sounds Like | The Fix |
|---|---|---|
| A ‘Starfish’ Flop | The keeper leaps and spreads all four limbs, belly facing the ground. The ball often goes under them. | Drive from a power step. Your momentum must be through the line of the ball, not just upward. Practice the step-and-collapse for low balls. |
| Looking Away on Impact | The head snaps to the side as the shoulder hits the ground. The ball spills loose. | “Keep the head still and the eyes focused on the ball.” (FA). Drill securing a stationary ball from a collapse, holding eye contact until it’s in your chest. |
| Slapping at the Ball | An open-handed, panicked swipe that often palms the ball into the net or out for a corner. | Use “Soft hands – Strong wrists” (FA). For catches, present the “handcuffs” formation and scoop. For parries, use the “big palm” to deflect downward and wide. |
| Poor Landing | A jarring, straight-arm impact or a knee slamming down first. You’ll hear a nasty slap or feel a sharp joint pain. | Keep elbows slightly flexed to cushion impact (FA). Take the impact on the meaty part of your shoulder and side. Practice dives on soft ground first. |
| Forgetting the Recovery | The keeper makes a great stop, then lies there admiring it as a tap-in rebounds in. | Make “recovery saves” and “recover lines” a verbal part of every drill. Get up immediately. Your coach should be shouting “RECOVER!” as soon as you land. |
Frequently Asked Questions
How should a goalkeeper dive?
Goalkeeper should dive by initiating a power step with the foot nearest the ball, transferring bodyweight forward, and leading the movement with their hands in a controlled formation towards the ball’s line. The technique differs for low saves (collapse at the knees) and high saves (projection from a strong leg push), but the core principle is to move the body efficiently through the line of the ball, not just towards it.
How to not be scared of diving as a goalkeeper?
Start on soft ground or mats. Master the collapse and landing mechanics without a ball first, so your body learns the safe impact points (side and shoulder). Use progression drills that build from kneeling to standing, and always use proper protective gear like padded pants and quality gloves. Confidence comes from knowing your technique protects you.
How do goalkeepers not hurt themselves when diving?
They distribute the impact across the safe, muscular areas of their body, primarily the side of the torso and the shoulder, while keeping joints like elbows and knees slightly flexed to absorb shock. Proper technique, as dictated by The FA’s manual (tucking the elbow, taking impact on the side), is more important than bravery. A correct dive on a hard pitch is a controlled, distributed impact; a bad technique dive is a series of painful jolts.
Is 5’10” too short for a goalkeeper?
No, 5’10” is not too short, but it emphasizes the need for exceptional technique, explosive power, and superior positioning. A shorter keeper must rely more on the optimal, wide stance (SW75) to generate faster lateral movement, perfect their angle play to cut down the striker’s target, and develop a powerful vertical leap to compensate for reach on high balls. The dive’s speed, as shown in the science, can outweigh a few inches of height.
Before You Go
The biggest takeaway concerns your feet, not your hands or your courage. That 75% leg-length stance width from the research isn’t just a number; it’s a lever. It repositions your body’s center of mass and pre-tensions your muscles for a faster, more direct push-off. Before you work on another spectacular flying save, spend a session just finding and feeling that stance. Mark it on the ground. Get comfortable being uncomfortable.
Then, pair it with the oldest advice in the book: lead with your hands, watch the ball, and take the fall on your side. The science gives you the optimal launchpad; the decades-old manuals give you the safe flight path. Your job is to drill them together until the dive isn’t a leap of faith, but a calculated, explosive extension of your ready position. Now get to a pitch and measure your stance. The next low drive to your corner is already on its way.
