
How to Volley a Football: Step-by-Step
This post contains affiliate links. As an Amazon Associate, we earn from qualifying purchases.
To volley a football, you must strike the ball before it touches the ground, using a technique broken into three phases: Preparation, Contact, and Follow-through. The US Youth Soccer manual instructs players to focus on their feet first in the Preparation phase and keep their eyes on the ball through Contact. For power, biomechanical studies show you must maximize foot velocity through knee extension and contact the ball squarely with the instep.
That framework gives you the what and the when. The how, the specific joint movements that turn a hopeful swing into a controlled rocket, is where most guides stop. They tell you to “use your laces” and “follow through,” which is correct but incomplete. It’s like being told to drive a car by pressing the pedals and turning the wheel.
What follows is the mechanic’s view under the hood of how to volley a football. We’ll walk through the three-phase model, then layer on the biomechanics that explain why your trunk must lean and how your pelvis must rotate as the ball gets higher. You’ll learn the drills that build the motion safely, especially for the flashy jumping volley where the first lesson isn’t kicking, it’s learning how to fall.
Key Takeaways
- The volley technique is built on three phases: Preparation (feet and eyes), Contact (eyes and instep), and Follow-through.
- For a basic volley, power comes from knee extension and a square instep strike; as the ball height increases, hip and pelvis rotation become more critical.
- To practice the risky jumping side volley, start by mastering a safe falling technique before ever attempting the full kick in the air.
- Your foot speed drops as the ball comes in higher, so adjust your timing and lean, don’t just swing harder.
- The most efficient impact point for transferring power is near the mid-sagittal plane of your foot (the centerline of your laces).
The US Youth Soccer Three-Phase Framework
Every volley, from a simple side-foot pass to an overhead bicycle kick, follows the same mechanical sequence. The US Youth Soccer skills manual breaks the execution of any technique into three phases: Preparation, Contact, and Follow-through. This isn’t just coaching poetry; it’s a diagnostic tool. If your volley is weak or skewed, you can isolate which phase broke down.
The execution of a technique is broken down into three phases: Preparation – the movements leading up to contact with the ball. Contact – the placement of the feet and the posture of the body upon contact with the ball. Follow-through – the movements after contact with the ball.
Preparation is about your feet and your eyes. The manual is explicit: “focus on the feet first as they will impact what happens with the rest of the body and they must get the body to the ball.” Your planting foot determines your balance and the angle of your strike. Your eyes stay locked on the ball. This phase isn’t passive waiting; it’s active positioning. Your body is coiling.
Contact is the moment of truth. Your eyes must stay on the ball. This is the phase where “keep your eye on the ball” changes from a cliché to a critical instruction. The distribution of your body weight, the point of contact on your foot, and the position of your supporting leg all converge in a fraction of a second. Any flaw in your Preparation shows up here as a mistimed swipe or a topped shot.
Follow-through is the completion of the transfer of energy. It’s not a decorative flourish. A chopped follow-through means you decelerated your foot before impact, bleeding power. A full, smooth follow-through toward your target confirms you committed through the ball. It’s also your body’s natural braking system, helping you regain balance after the explosive motion.
TL;DR: Judge your volley by its phases. Poor contact? Check your preparation. Awkward recovery? Your follow-through was likely cut short.
The Biomechanics of Power: What Your Body Actually Does
So you’ve prepared, made contact, and followed through. Why did some shots scream and others flutter? The peer-reviewed biomechanics tell a precise story. It’s not about “swinging harder.” It’s about which joints you drive and when.
A key study from Fukuoka University had 15 male experienced university players volley balls set at four heights: 0 cm (a half-volley), 25 cm, 50 cm, and 75 cm. They measured what lower-body motions contributed to forward and upward foot velocity. The findings reframe the idea of a one-size-fits-all volley.
For driving the foot forward (Ffv) to generate power, three actions are major contributors:
- Left hip linear velocity (for a right-footed kicker).
- Knee extension.
- Pelvis retroflexion (a pitching rotation of the hips).
But here’s the adaptation: as the ball height increased from the ground to 75 cm, the contribution of the hip’s forward velocity got smaller. The roles of knee extension and pelvis pitch rotation held steady. Also, a pelvis yaw rotation (a clockwise turn for a right-footed kick) only became a significant contributor for the true volleys (25cm and above), not for the ground-level strike.
For driving the foot upward (Fuv) to meet a high ball, the contributors are different:
- Knee flexion.
- Hip internal rotation.
- Pelvis roll rotation.
- Hip flexion.
Again, height changes the recipe. As the ball rose, the contributions from knee flexion and hip flexion decreased, while the input from hip internal rotation and pelvis roll systematically increased.
| Primary Goal | Key Joint Actions | How They Change with Higher Balls |
|---|---|---|
| Generate Power (Forward Velocity) | Knee Extension, Pelvis Pitch Rotation | Stable contributions; hip forward drive becomes less important. |
| Lift Foot to Ball (Upward Velocity) | Hip Internal Rotation, Pelvis Roll Rotation | Contributions increase significantly as ball height rises. |
| Fine-Tune Strike | Pelvis Yaw Rotation | Only activates in true volleys (ball >0 cm off ground). |
What does this mean for you on the pitch? For a low, driven volley, think about knee extension and pelvis pitch rotation, as the contribution of hip forward drive diminishes with higher balls. Your body already makes these adjustments subconsciously, but knowing them helps you diagnose faults. A weak high volley often means you didn’t engage that hip internal rotation.
Volleying Different Heights: The Adjustments You Must Make
You don’t volley a ball at your shins the same way you volley one at your chest. A University of Belgrade study on side volleys found that the maximum linear velocity of the foot (V_FOOT_max) dropped as ball height increased. Your foot is simply slower when it has to travel upwards on a steep angle. This has a direct tactical implication: you cannot rely on pure power for high volleys. Placement and timing become paramount.
A peer-reviewed study found that to volley, you need to squarely hit the ball with the instep part of the foot while maximizing foot velocity through knee extension. It also confirmed that tilting the trunk is a sound instruction for most volleys, except for very high balls. That lean isn’t just for style; it counterbalances the lifting leg and keeps your center of mass over your base.
Where this goes sideways: Trying to use the same full-power, ground-shot technique on a high ball. Your foot speed is physiologically lower, so over-swinging throws your balance and you sky the shot.
So what are the adjustments?
- For Low Balls (Half-Volley): Your technique can most closely resemble a ground shot. Power comes from hip drive and knee extension. Keep your torso relatively upright.
- For Mid-Height Balls (Knee to Waist): For mid-height balls, integrate a trunk lean and engage the pelvis yaw rotation that is characteristic of true volleys.
- For High Balls (Chest & Above): For high balls, concentrate on engaging your hip internal rotation and pelvis roll to get your foot to the ball, as these contributions increase with height.
The Jumping Side Volley: Starting with the Fall
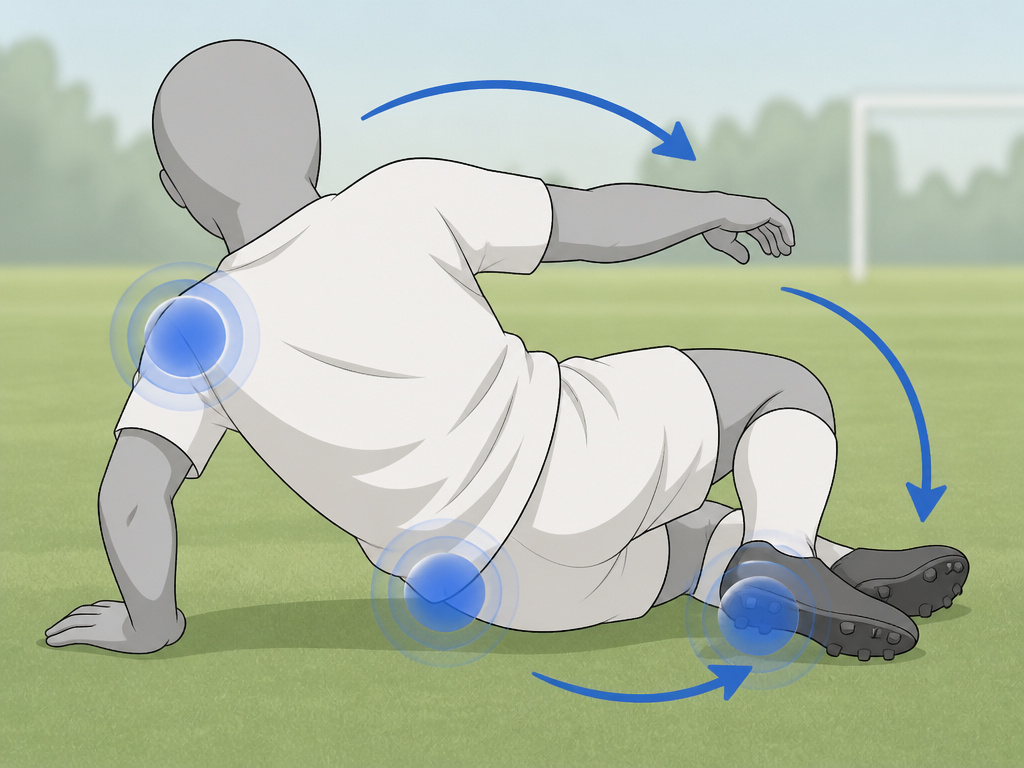
The jumping side volley is the highlight reel king. It’s also a great way to land badly. One study analyzed 23 successful trials from five college-level subjects. The study concluded that training should begin with learning a safe falling technique.
The study identified five key elements for the jumping side volley:
- Control of trunk rotation during the jump.
- The angle between thighs upon take-off.
- Whip-like control of the kicking leg while airborne.
- Timing between ball motion and limb coordination.
- The damping mechanism during falling.
Notice the fifth point: the damping mechanism during falling. The researchers concluded that because an accurate kick requires repetitive practice, athletes must first master a safe landing technique to minimize injury risk. Therefore, training should begin with learning a safe falling technique.
Common mistake: Practicing the jumping volley by just kicking and crashing. You’ll either get hurt or develop a fear of the skill that ruins your technique.
This flips the standard “practice makes perfect” model for how to volley a football on its head. Your first sessions on the jumping volley should begin with learning a safe falling technique. Practice the jump, the slight twist in the air, and then the landing: absorbing impact with a roll, using your arms and legs as shock absorbers. Once that landing is automatic and safe, then introduce the ball, starting with gentle tosses. The skill isn’t just the strike; it’s the entire aerial sequence and the safe return to earth.
Drills to Train the Volley Technique
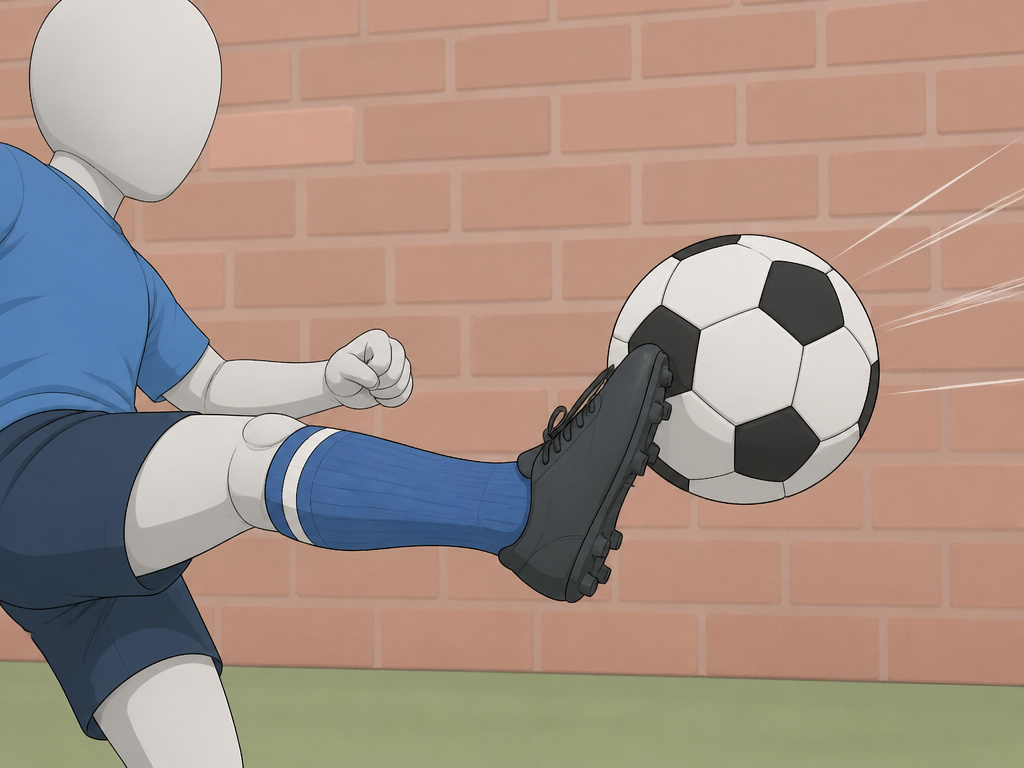
You need reps, but mindless reps build bad habits. These drills isolate phases and conditions.
1. The Wall Relay (For Timing and Clean Contact)
This is the best solo drill. Stand a short distance from a solid wall. Toss the ball up in front of you with your hands and volley it against the wall. Control the rebound with your feet or chest, then set it up and volley again. Start simple: focus on clean instep contact and a short backlift. The page on wall drills has more progressions for varying the service.
- Goal: Consistent, solid contact. Listen for a clean “thump,” not a slapping sound.
- Progress: Increase power, then volley from the rebound without catching it first.
2. The Service & Strike (For Match-Like Conditions)
You need a partner. Have them serve balls to you from the side, chest height, waist height, low. Your job is to adjust your feet and volley toward a target (a cone, a mini-goal). This trains the Preparation phase under light pressure. Are your feet getting you to the right spot?
- Goal: Solid contact and accuracy, not power.
- Progress: Have your server vary the height and pace randomly. Add a passive defender.
3. The First-Time Finish Drill
Set up in the penalty area. Have a partner or coach play a lofted pass from the wing toward you. Volley it first-time on goal. This links the volley directly to a game context, finishing. It forces you to judge flight, adjust your body, and strike while keeping the shot down. This is the practical application of a good first-time finish.
- Goal: Compose your body and make clean contact under the pressure of a goal-scoring opportunity.
- Progress: Add a goalkeeper. Demand different finishing zones (far post, near post).
Common Volley Mistakes and How to Fix Them
Mistake: Taking Your Eye Off the Ball.
- The Consequence: You top the ball over the bar or shank it wide. Contact is inconsistent.
- The Fix: This is a discipline issue. Verbally say “foot, ball” to yourself as you prepare to kick. Drill it with easy, tossed serves where your only job is to watch the ball onto your foot.
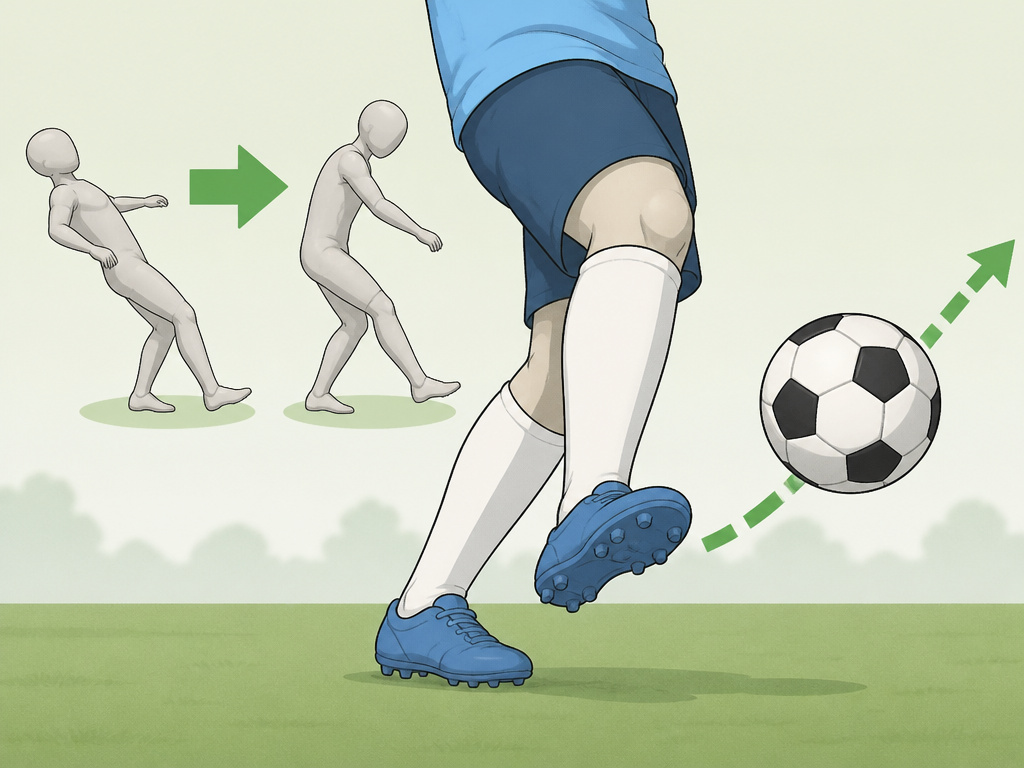
Mistake: Leaning Back.
- The Consequence: The ball balloons skyward every single time. This often happens when you’re reaching for a ball slightly behind you.
- The Fix: Focus on getting your planting foot next to where the ball will be struck, not behind it. This naturally brings your shoulders forward. Practice volleys with your back against a fence, if you lean back, you hit the fence.
Mistake: Stiff Ankle on Contact.
- The Consequence: A weak, slapping impact. The ball doesn’t zip.
- The Fix: Your ankle must be locked and firm, presenting the hard bone of your instep. Imagine your foot is a golf club head. Practice gentle volleys against a wall, listening for a crisp sound. A soft “pat” means a floppy ankle.
Mistake: Over-swinging on High Balls.
- The Consequence: You lose all balance and connection, whiffing or mis-hitting.
- The Fix: Remember the biomechanics, your foot is slower going upward. For high balls, shorten your backlift. Think “guide” not “blast.” Use the technique for controlling a high ball to set yourself before the volley.
How to generate power in a volley
Power comes from specific body mechanics, not just swinging harder. To maximize foot speed, focus on knee extension and hitting the ball squarely with your instep. Your trunk should lean into the kick, a sound instruction for most ball heights. As the ball comes higher, your body naturally adjusts with deeper knee flexion, more hip rotation, a greater trunk lean, and increased pelvis rotation. These motions are systematic and increase with the ball’s height. For forward power, the major contributors are your supporting hip’s linear velocity, knee extension, and pelvis rotation. Remember, your foot’s maximum velocity actually drops as the ball height increases, so proper technique becomes even more critical for power generation.
How to balance for a volley
Balance starts with your feet in the preparation phase, as they position your entire body to meet the ball. A University of Belgrade study on side volleys found that the distance between the foot and hip at impact, and the angle between the shoulder-hip and hip-foot axes, increase with the speed of the incoming ball. This requires a stable base. In a side volley, the knee joint primarily fine-tunes the distance to the ball. In a jumping side volley, controlling trunk rotation during the jump is a key element for stability, directly linked to maintaining balance throughout the airborne motion.
Frequently Asked Questions
What’s the difference between a volley and a half-volley?
Volley is struck before the ball touches the ground. A half-volley is struck immediately after the ball bounces, as it’s rising from the turf. The technique is very similar, but the timing for a half-volley is even more precise, as you’re hitting a moving ball off a moving surface.
Should I use my laces or the inside of my foot?
For power and distance, use your laces (instep). For accuracy and shorter passes, use the inside of your foot. The instep drive is the standard for shooting, while the side-foot is for controlled passes. Your choice depends on the game situation. Work on your shooting with laces for power and your side-foot for placement.
How can I generate more power on my volley?
Power comes from technique, not muscle. Ensure you are: 1) Using your instep with a locked ankle, 2) Snapping your knee through extension at the moment of contact, and 3) Following through completely toward your target. A strong powerful shot relies on this kinetic chain from the ground up.
Why do I keep missing the ball completely?
This is almost always a timing and eye-tracking issue. You are likely looking at the target (the goal) before you’ve struck the ball. Your entire focus from the moment the ball is in flight until after contact must be on the ball itself. Practice with softly tossed balls where the only objective is to make contact.
Is the jumping volley worth learning?
It’s a low-percentage skill, even for pros. Its value is situational, it can be a spectacular solution to a specific cross. However, the time investment is large and the risk of injury is higher. Master the standard volley from the ground first. If you do train the jumping volley, always start by learning how to land safely, as the research advises.
How do I practice volleys alone?
The wall is your best partner. Use the Wall Relay drill outlined above. You can also use a rebounder net or simply kick a ball high in the air and try to volley it before it lands, though this is less controlled. Consistent solo passing drills build the muscle memory.
Before You Go
The volley isn’t a wild hack. It’s a disciplined strike with a clear mechanical blueprint. The three-phase model. Preparation, Contact, Follow-through, is your checklist for every attempt. The biomechanics tell you the levers to pull: knee extension for drive, hip rotation for height.
Here’s the one rule most guides skip: if you’re struggling with high volleys, stop trying to murder the ball. Your foot is slower on the ascent. Power comes from clean contact on the instep’s midline, not from a furious swing. Sometimes the best volley is a guided side-foot pass into the corner.
Everything above assumes you’re building on a solid base of ball control. A shaky first touch ruins the volley before it begins. So start there, then add the strike. The goal isn’t just to hit the ball in the air; it’s to make the difficult look simple. That only happens when you understand the mechanics behind the magic.
