
How to Frame a Football Shirt: The 5-Step DIY Process
This post contains affiliate links. As an Amazon Associate, we earn from qualifying purchases.
To frame a football shirt, you need a deep shadow box frame with a 35–55mm rebate, acid-free backing boards, and a reversible mounting method like hidden stitching or stainless steel pins through the seams. Never use glue, tape, or spray, and always use UV-protective glazing to prevent signatures and fabric from fading.
The gap between the shirt and the glass is where the whole preservation game is won or lost, so consider our guide on shirt storage for long-term care. Press the fabric against the glazing and you trap moisture, encourage mould, and flatten any signature. Give it space in a deep shadow box with a rebate of 35–55mm, and the shirt exists in its own protected microclimate. A key part of the process is learning how to frame a football shirt correctly.
What follows is the method used by professional framers who handle match-worn and signed memorabilia, broken down so you can do it yourself. This article explains the two main debates among framers: whether to wash a signed shirt and whether to pin or stitch it. It also provides the measurements you need for a perfect fit.
Key Takeaways
- Use a shadow box frame with a 35–55mm rebate (deeper for rugby shirts) so the fabric never touches the glass.
- Mount the shirt with dozens of hidden stitches in conservation-grade thread or stainless steel pins through the seams; glue and tape are permanent and damaging. Sources disagree on pinning: lovetoframe.com advises stitching and warns pins rust and pull holes, while plotcaster.com describes pinning at shoulders, sides, and hem as a method.
- You must use UV-protective glass or acrylic for signed shirts, as direct sunlight will fade ink and fabric over time.
- For a signed shirt, do not wash it; for a modern, unsigned shirt, wash and dry it fully before framing to prevent soil oxidation. Sources disagree: plotcaster.com advises against washing signed shirts to protect the ink, while the Canadian Conservation Institute states textiles should be cleaned before mounting and framing.
- If the shirt is old, fragile, valuable, or has fugitive dyes, mould, or tears, take it to a professional textile conservator.
The Two Paths: DIY Framing vs. Professional Service
This isn’t a question of skill. It’s a question of the shirt’s value, both sentimental and monetary, and your tolerance for the very precise, slightly fiddly work of how to frame a football shirt. A modern replica you bought on sale is a perfect DIY candidate, especially if you’ve verified its authenticity with our guide to spot a fake shirt. Your grandfather’s match-worn cup final shirt from 1974 is not.
Professional framing typically costs between £160 and £290 for a single signed shirt in a deep shadow box. You’re paying for materials (conservation-grade boards, UV glass, hardwood frame), the workshop’s time, and their guarantee against defects. The price moves with the frame moulding and the glazing specification.
A kit like the X-Large Double Matted Jersey Display Frame includes a frame, UV acrylic, and matting. Sourcing separately means buying a deep frame, cutting acid-free foam board, and finding the right glazing. The kit is easier;
Where this goes sideways: Choosing DIY for a shirt that should go to a pro. The Canadian Conservation Institute (CCI) lists specific conditions that need a textile conservator: fugitive dyes, mould, insect damage, stains, splits, and tears. If your shirt ticks any of those boxes, the cost of a professional is cheaper than the cost of a mistake.
Choosing the Right Frame and Materials
The frame is more than a border. It’s a sealed environment. The wrong materials inside that environment will damage the shirt slowly, and you might not notice for years.
You need a shadow box, not a standard picture frame. A shadow box has deep sides, creating a compartment for the shirt to sit inside. The critical measurement is the rebate, the depth from the front of the frame to the backing. For a football shirt, that’s 35–55mm. For a heavier rugby shirt, aim for 50–65mm. This depth allows for a padded insert inside the shirt and a 10mm air gap between the fabric and the glazing.
The glazing is your shield. Whichever you choose, it must block UV light. Look for glazing rated for 98% UV protection or higher. Without it, signatures will fade and white fabric will yellow over time if placed on a sunny wall.
Inside the frame, every material that touches the shirt must be acid-free. That includes the backing board and the board you insert into the shirt to give it shape. Acidic boards slowly release compounds that yellow and weaken fabric. It’s a chemical process you cannot see until it’s done.
| Material | Purpose | What to Look For |
|---|---|---|
| Shadow Box Frame | Holds the assembly; provides depth. | 35–55mm rebate; hardwood or quality composite. |
| UV-Protective Glazing | Shields from light damage. | Glass or acrylic with >98% UV filter. |
| Acid-Free Backing Board | The rear surface the shirt mounts to. | Conservation-grade, pH-neutral mountboard. |
| Acid-Free Foam Board Insert | Gives the shirt body and shape. | Cut 10–15mm narrower than the shirt’s body. |
| Mounting Thread or Pins | Secures the shirt reversibly. | Conservation-grade cotton thread or stainless steel pins. |
Preparing the Shirt: To Wash or Not to Wash?
Here is the single clearest conflict in the research. The rule from the Canadian Conservation Institute is unambiguous: textiles should be cleaned before they are mounted and framed. Soils and oils from skin can oxidize over time, causing stains, fibre weakness, and attracting insects.
The real-world exception is the signed shirt. The signature is ink. If it runs in the wash, it’s gone forever. Framing guides explicitly tell you not to wash a signed shirt. So you have two authorities giving opposite instructions.
The way through is to separate the shirts into three categories:
- Signed Shirts: Do not wash. The risk to the signature outweighs the risk of soil.
- Match-Worn Shirts (Unsigned): Do not wash if the marks (mud, grass) are part of the story. Let the shirt dry completely before framing to prevent mould.
- Modern, Unsigned Replicas: Wash it. Use a gentle cycle, dry it fully, and press it lightly through a cloth with a cool iron, keep the iron off any printed badges or numbers.
The part nobody mentions: Starch and fabric stiffener sprays are banned. CCI lists them as things that should never touch a textile being framed. They become sticky over time and attract dust you can’t clean.
The 5-Step DIY Process (and When to Call a Pro)
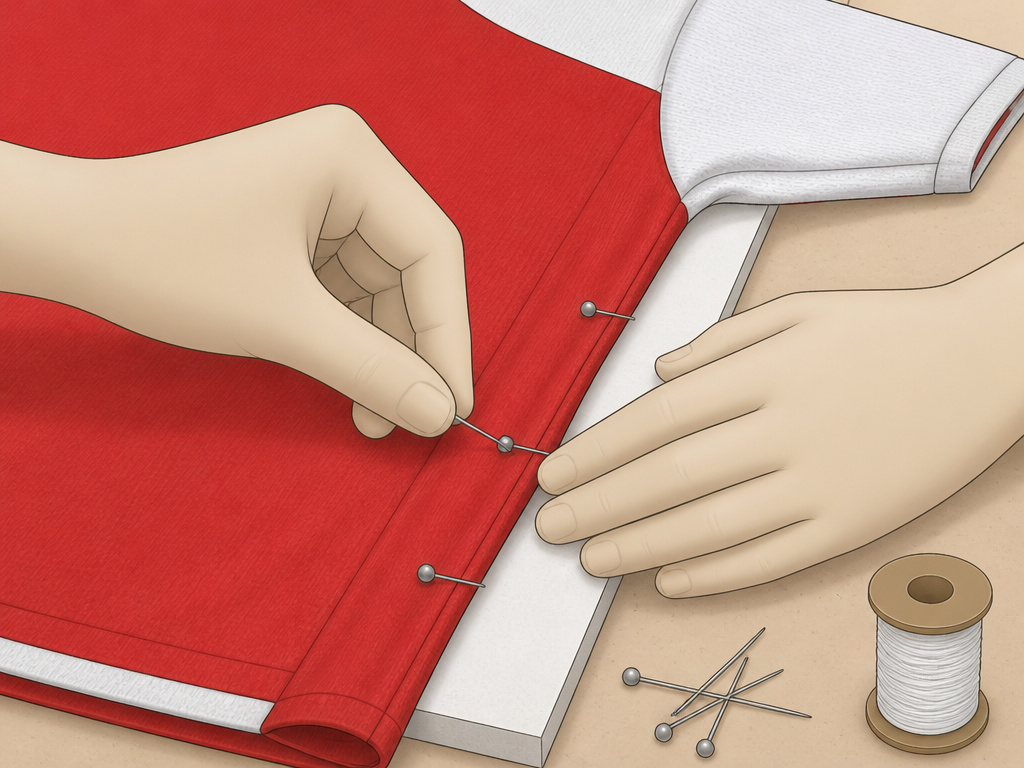
If your shirt fits the DIY category, follow this sequence. Work on a large, clean, flat surface and take your time.
Step 1: Plan the Layout and Measure
First, decide how you want the shirt to sit.
Lay the shirt out in your chosen style on a large sheet of paper. Mark the outermost points. Then, add at least 50mm of margin on every side. This margin is your clear backing space; it keeps the shirt from feeling crammed in the box. These outer dimensions are the minimum interior size your shadow box needs to be, which you can plan using our shirt sizing guide.
Step 2: Build the Shirt Form
The shirt needs an internal skeleton to hold its shape. Cut a piece of acid-free foam board to the outline of the shirt’s body, straight sides, sloped shoulders, a shallow neck curve. Here’s the key spec: make this form 10 to 15mm narrower than the shirt’s body. This allows the side seams to wrap around the edges without pulling or wrinkling the fabric.
Slide the form inside the shirt. Fold the sleeves into your chosen position and tuck the hem under if needed. The shirt should look natural, not stretched tight like a drum skin.
Step 3: Mount the Shirt to the Backing
This is the other great framing debate: to pin or to stitch? The research presents two valid, reversible methods.
The Stitching Method (Museum Standard):
The shirt is anchored with dozens of small, hidden stitches using conservation-grade cotton thread. You work through existing seams and hems where possible. This spreads the weight across countless tiny anchor points, preventing the slow sag that happens when a shirt is held only at the shoulders. Every stitch can be snipped later, leaving only tiny, invisible needle marks in the seams.
The Pinning Method (Common DIY):
The shirt is secured with pins pushed through the seams. The critical detail is the pin material: they must be stainless steel. Plain steel pins rust, leaving permanent rust-brown dots on the fabric. Sources recommend entomology pins or even small safety pins pushed through seams as a low-damage option.
Place the padded shirt on the backing and pin it at the shoulders, sides and hem. Take the pins out as the stitching goes round. From the CCI-inspired mounting guide
The universal rule is no glue, no tape, no staples. Those are permanent bonds. They will fail or discolour, and removing them will damage the fabric.
Step 4: Assemble the Frame
Place your mounted shirt assembly into the shadow box. Ensure the 10mm air gap is maintained between the highest point of the shirt (usually a button or folded sleeve) and the glazing. Ensure the 10mm air gap is maintained between the highest point of the shirt and the glazing.
Before sealing, do a final lint roll and inspect for dust.
Step 5: Seal and Hang
Secure the backing into the frame. Seal the gap between the backing and the frame with acid-free framing tape to prevent dust ingress. Attach hanging hardware rated for the frame’s weight, a heavy shadow box needs sturdy D-rings and wire.
Hang it on an interior wall, out of direct sunlight. Even with UV glass, prolonged direct light creates heat and accelerates ageing. I framed my first shirt on a sunny wall, and the white shoulders had a creamy tint within two years. An interior wall fixed it for every shirt after.
Preserving Autographs and Delicate Shirts
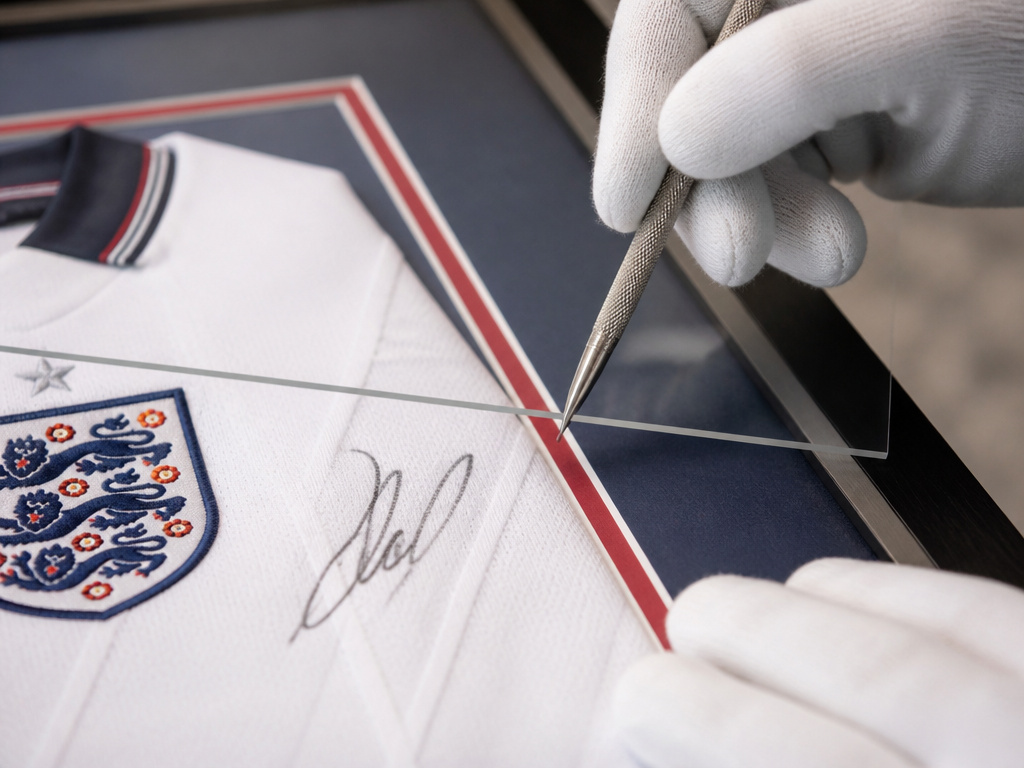
A signature changes everything. The ink is often water-soluble, and the pressure of a wash cycle can lift it. As one source bluntly states: if the signature runs or lifts, it cannot be put back.
The preservation priority shifts entirely to the signature. For this reason, UV-protective glazing is essential. It also means you should avoid any mounting method that puts pressure on the inked area. If the signature is on the chest, avoid placing a pin or a tight stitch directly through it. Work around it.
For truly delicate shirts, fabrics that are thin or damaged, or shirts with known fugitive dyes, the standard DIY procedure is broken. These need the controlled environment and expertise of a professional textile conservator. The cost is an investment in the shirt’s long-term preservation.
Frequently Asked Questions
Can I use a normal picture frame?
No. A standard picture frame has a shallow rebate, which will press the glass directly against the shirt. This traps moisture, flattens the fabric and any signature, and risks condensation damage. You must use a deep shadow box.
How much does it cost to frame a football shirt professionally?
For a single signed shirt in a deep-box frame with UV glass, expect to pay between £160 and £260. A signed rugby shirt, being larger and needing a deeper box, typically costs £180 to £290. Prices vary with frame moulding and glazing specifications.
What’s the best way to secure the shirt without damaging it?
The two approved, reversible methods are hidden stitching with conservation-grade cotton thread and securing with stainless steel pins through the seams. Stitching with conservation-grade cotton thread prevents long-term sagging. If pinning, you must use stainless steel pins to avoid rust stains.
Should I wash a signed football shirt before framing?
Do not wash a signed shirt. The risk of the signature running or lifting is permanent and irreversible. For unsigned shirts, washing is recommended to remove oils and soils that can oxidise and damage the fabric over time.
Before You Go
One rule cuts through all the complexity: if you can’t replace the shirt, don’t experiment on it.
The depth of the frame, that 35–55mm, is your most important number. Get that wrong, and nothing else fits. Just keep it out of the sun.
