
How to Do a Bicycle Kick: 5-Step Breakdown
This post contains affiliate links. As an Amazon Associate, we earn from qualifying purchases.
To do a bicycle kick, you launch backwards off your kicking foot, thrust your non-kicking leg high, and then swing your kicking leg through to strike an airborne ball above your head with your instep as you fall. The official coaching manual calls it a “highly advanced skill” that requires gymnastics-like capability and should only be attempted when defenders are not close. Most attempts miss, and the landing is the most dangerous part.
That last point about the landing is the one every highlight reel edits out. You see the spectacular connection, not the awkward, often painful, thud that follows. According to the detailed breakdown from Coaching American Soccer, the entire skill is a controlled fall where your body is inverted—getting that part wrong is how injuries happen.
What follows is a walkthrough of the official coaching steps, the essential safety rules most guides gloss over, and a realistic path from your first nervous jump on a soft mat to even thinking about trying it in a match.
Key Takeaways
- The landing is the most dangerous part; practice falling onto your upper back and shoulders on a soft surface long before you try to hit a ball.
- It is a full-body acrobatic skill that builds on the “hitch kick” and “flying side volley”; you need the strength and air awareness of a gymnast, not just a powerful leg.
- Use your dominant foot and aim to strike the ball with your instep, making contact over the ball’s midline to keep it down.
- The official coaching source says never attempt it on a bad or wet field, into an oncoming opponent, or if a defender is close enough to undercut you.
- Expect to miss. The manual is clear that bicycle kicks have a low probability of scoring, so your first priority is always safety, not spectacle.
What a Bicycle Kick Actually Is (And Isn’t)
We should clear something up right away. If you searched for how to do a bicycle kick, you might have found two completely different things. One is the football skill we’re here for. The other is a guide for propelling a Kickbike scooter, which tells you to “stand straight and relax between the kicks.” That’s a different world.
In soccer, a bicycle kick is defined by Coaching American Soccer as “an extremely acrobatic skill whereby a player essentially inverts their body in mid-air to strike an airborne ball, arriving above the level of their head, backward from the direction they are facing.” In contrast, Kickbike Worldwide uses the term for a ground-based propulsion technique for a footbike/scooter.
The name comes from the pedaling motion of the legs central to how to do a bicycle kick. It’s also called an overhead volley or a scissor kick. But whatever you call it, the core is the same: your back is to the goal, you’re falling backwards, and you’re meeting a high ball most players would just let drop.
This is a ball skill whereby the non-kicking leg is thrust high into the air in order to raise the path of the kicking leg as it is thrust even higher into the air to strike the ball immediately thereafter with the instep. The legs slicing beside one another in mid-air is what looks like the “pedaling” of a bicycle.
This technical definition from the primary source gives us the blueprint. The non-kicking leg goes up first to create the height and rotation. The kicking leg follows to make contact. It’s a sequence, not a simultaneous jump and swing.
The Prerequisites: Can You Even Try This?
The coaching manual doesn’t start with the kick. It starts with the player. It states that anyone attempting this should be “experienced, competent, confident, and exhibit gymnastics-like capabilities.”
That’s the first filter. If you can’t do a controlled backflip onto a soft mat, you have no business trying a bicycle kick in the air. The manual explicitly says to “start with gymnastics routines, advancing to backflips” if you want to get to this level. This isn’t about bravery; it’s about having the core strength and spatial awareness to not land on your neck.
You also need the foundational football skills. The bicycle kick is described as the “culmination” of learning the hitch kick and the flying side volley. If those terms are new to you, you’re putting the cart before the horse. A hitch kick is that running jump where you cycle your legs in the air—it’s the basic coordination you need. A flying side volley is a simpler, sideways version of striking a ball in the air.
Where this goes sideways: Trying the full bicycle kick before mastering the hitch kick. You’ll lack the basic air control and likely spin uncontrollably, landing on your side or worse.
Before you even look at a ball, your checklist is:
- Solid overall fitness and core strength.
- Comfort with basic gymnastics (backward rolls, backflips onto soft mats).
- Proficiency in the hitch kick and flying side volley.
- A soft, forgiving practice surface like a gym mat or deep grass.
The 5-Step Bicycle Kick Breakdown
This is the sequence from the coaching manual, broken into the actual movements. Don’t think of these as slow stages. “Everything happens very quickly,” the source says. But you learn it in slow motion.
Step 1: Set Your Position and Sight the Ball
The ball must be in the air, above your head, and on the opposite side of you from the goal. You’re likely facing the goal as the cross comes in, but it’s going behind you. Turn your back to the goal and keep your eyes locked on the ball. The manual stresses that “defenders must not be too close and vision is maintained on the ball.”
Step 2: Launch Off Your Kicking Foot
You don’t jump straight up. You push off with your kicking foot and thrust your arms, head, and shoulders backward to initiate rotation. Push off the ground with the foot that will eventually make contact. This backward momentum is what starts your rotation. Thrust your arms, head, and shoulders back to initiate the fall.
Step 3: Thrust the Non-Kicking Leg High
As your upper body goes back, drive your non-kicking leg up as high as you can. This isn’t a gentle lift. This forceful thrust does two things: it helps rotate your torso further, and it “raises the path of the kicking leg” so it can swing through into the space you’ve created.
Step 4: Swing the Kicking Leg Through and Strike
Now the kicking leg follows. Swing it up and through to meet the ball. Strike it with the instep of your foot. The manual offers a key tip on contact: “It is better to try to be over top of the midline of the ball than below it.” Aim to make contact over the midline of the ball to keep the shot down.
Step 5: Land on Your Upper Back/Shoulders
You are now falling. Do not try to land on your feet or your hands. Absorb the impact across your upper back and shoulders, tucking your chin to your chest. This is why the soft surface is absolutely essential in practice.
| Step | Key Action | Common Mistake | The Why (Mechanism) |
|---|---|---|---|
| 1. Set & Sight | Turn back to goal, eyes on ball. | Not turning fully, losing sight of the ball. | You need to know the ball’s exact trajectory to time the jump. Guessing leads to a complete miss. |
| 2. Launch Backwards | Push off kicking foot, throw arms/head back. | Jumping vertically instead of backwards. | Vertical jumps don’t create the rotation needed to get your leg over your head. The backward launch starts the flip. |
| 3. Lead Leg Up | Thrust non-kicking leg high into the air. | Kicking leg swings first or both legs move together. | The leading leg acts as a counterweight, pulling your hips up and creating the space and rotation for the kicking leg to swing through powerfully. |
| 4. Strike with Instep | Swing kicking leg through, connect over ball’s midline. | Using the toe or laces, or hitting underneath the ball. | The instep provides a large, flat surface for control. Hitting over the midline applies topspin, driving the ball down toward goal. |
| 5. Controlled Fall | Land on upper back/shoulders, chin tucked. | Sticking out an arm or trying to land on feet. | Landing on an outstretched arm risks a break. A distributed impact across your back is the safest way to dissipate the force. |
Safety Rules You Cannot Ignore
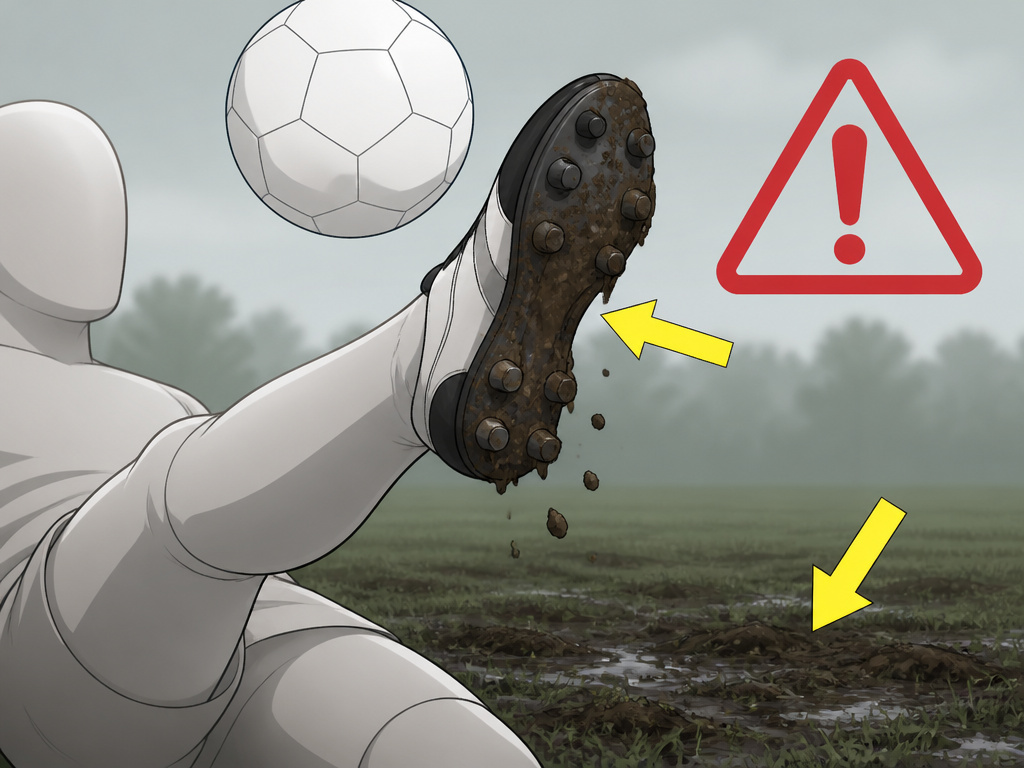
The Coaching American Soccer manual is more of a safety briefing than a trick-shot guide. It layers on warnings because the consequences of getting this wrong are real. This isn’t scare talk; it’s the predictable outcome of physics.
Do not attempt a bicycle kick on a bad or wet field. A slip on takeoff or landing on hard, uneven ground multiplies the impact force. Ankle rolls become breaks.
Do not attempt a bicycle kick into an oncoming opponent or if there is a chance of hitting someone’s head. You can be called for dangerous play, and you risk seriously injuring another player. This is particularly true if there is any chance of being undercut by a defender.
The source is explicit about in-game use: “Although a bicycle kick can be performed anywhere on the field, it is almost exclusively used as a shot on offense. On defense, it is usually far too risky given the consequences of failure.”
Your personal safety checklist is stricter than the game’s rules:
- Surface: Perfect grass or a gym mat. Never concrete, hard ground, or mud.
- Space: A huge, clear area. No people, no benches, no goalposts within falling distance.
- Defenders: None. If an opponent is in close proximity, do something else. The manual advises, “Look to do something else first, such as a backpass. ‘Play simple.'”
Where (and When) to Use It In a Game
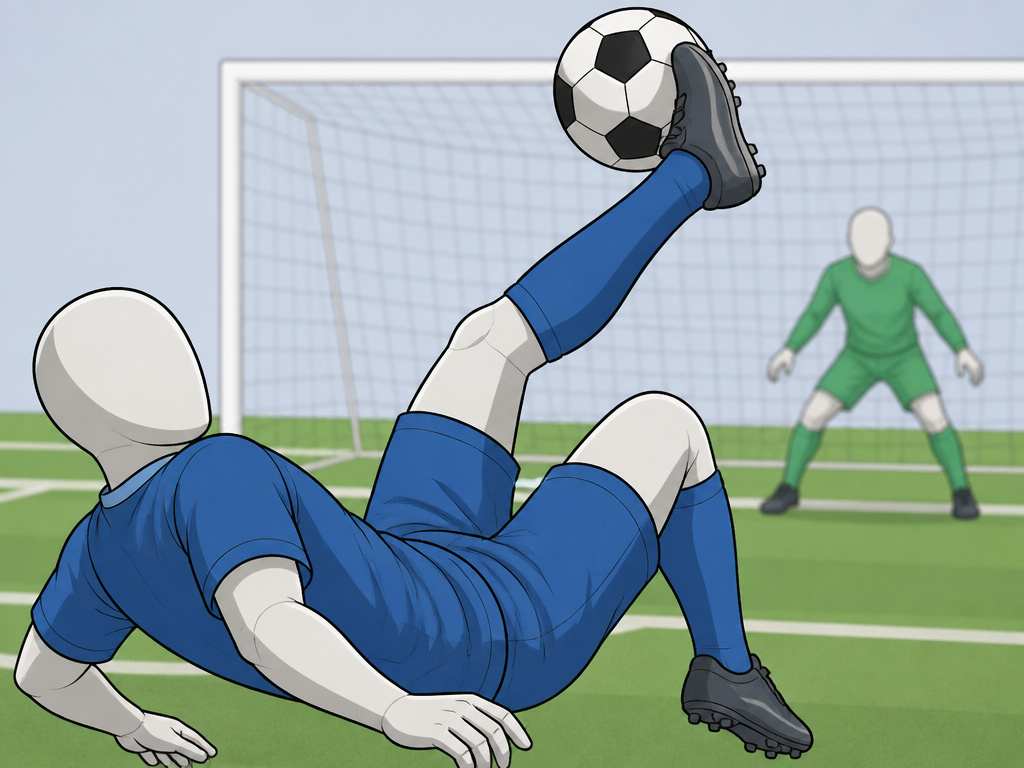
To be honest. For the vast majority of players, the answer is “nowhere.” The manual calls it a “highly advanced skill” for a reason. But if you have the capability, the classic scenario is in the penalty area. A looping cross is coming into the penalty area, and the ball is arriving above your head and behind you. The goalkeeper is rooted. That’s the moment.
It’s a surprise weapon. If you’re marked tightly, it’s a terrible idea. The risk of clattering into a defender or being undercut is too high. The manual stresses awareness: “Know where you are. Like any other shot, the bicycle kick needs to be on goal.”
And you have to manage expectations. The source flatly states, “Although bicycle kicks are spectacular, they have a low probability of scoring.” You try it because the alternative is no shot at all, not because it’s your best option.
A Realistic Practice Progression
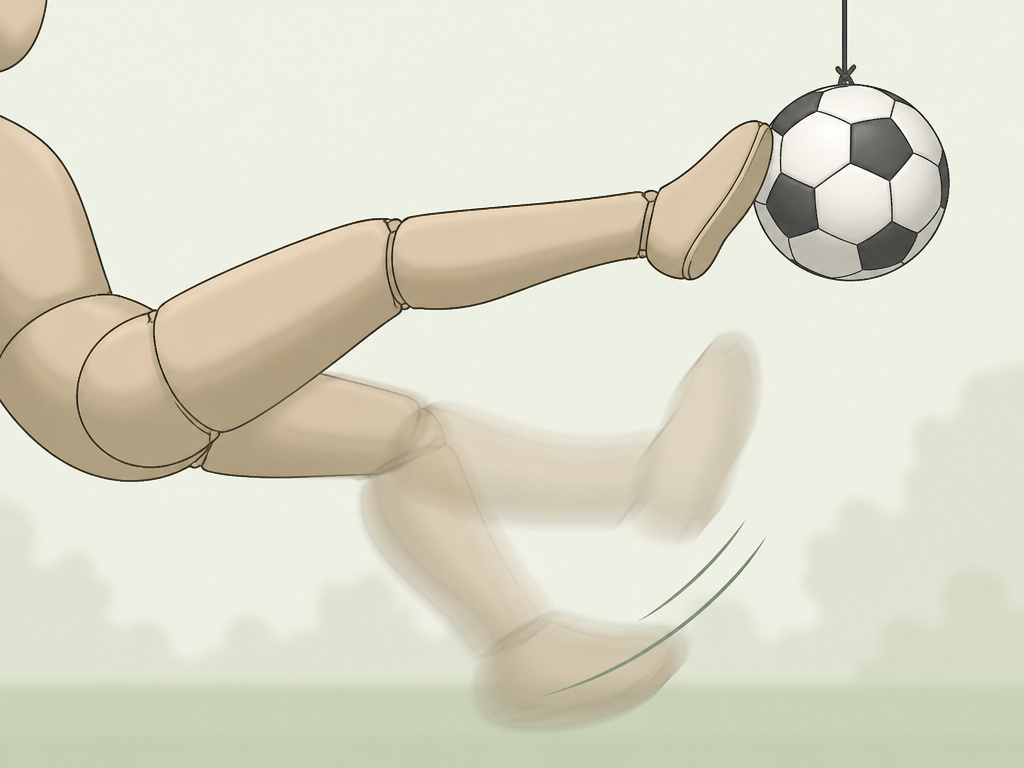
You don’t go from never trying to hitting a screamer. You build it in layers, divorcing the technique from the strike until the very end.
Phase 1: The Landing (No Ball)
Find a soft gym mat or a pit of foam. Practice the launch and fall from a standing position. Jump backwards, throw your arms, and land on your upper back. Get comfortable with the sensation of falling safely. Do this until it feels routine, not scary.
Phase 2: The Leg Motion (No Ball)
On the soft mat, add the leg action. Lying on your back, practice the “pedaling” motion—thrusting one leg up, then swinging the other through. Then try it from the standing jump. Focus on the sequence: lead leg up, then kicking leg through.
Phase 3: Hanging Ball Drill
Hang a ball from a string or a goalpost at about head height. Stand with your back to its intended direction. Practice the full motion, making soft contact with the stationary ball. This teaches you the contact point and timing without a moving target.
Phase 4: Soft-Toss Drill
Have a partner toss the ball gently over your shoulder from a short distance. Don’t try to score. Just try to make clean contact and land safely. The goal here is coordination, not power.
Phase 5: Graduated Crosses
Only when Phases 1-4 are second nature do you move to receiving crosses. Start with gentle crosses from a partner. Gradually increase the pace. Always, always practice in the penalty area with a soft landing zone.
Common mistake: Overtraining. Your body and brain need time to absorb the complex motor skill. Short, focused sessions are better than one long, frustrating one where your form breaks down.
How to Do a Bicycle Kick in FC 25
The virtual pitch is where everyone can be acrobatic without risk of injury. The mechanics are different, but the principle of timing is the same. Generally, you’ll need to press the shot button (Circle/B) while holding the L2/LT button (for flair shots) as a cross comes in. Your player needs to be positioned correctly—facing away from goal with the ball arriving behind them.
It’s a great way to visualize the timing without the bodily consequences.
What is a bicycle kick called?
The move you’re trying to learn is most famously called a bicycle kick. This name comes from the action of the legs, which looks like pedaling a bicycle upside-down. You might also hear it called an overhead volley or a scissor kick, and players sometimes shorten it to just a “bike.” It’s an extremely acrobatic skill where a player inverts their body in mid-air to strike an airborne ball that’s behind them, above head level. While it’s a spectacular part of advanced soccer, remember it has a low probability of scoring and is considered a high-risk maneuver due to the inverted landing.
Frequently Asked Questions
How do I do a bicycle kick for beginners?
As a true beginner, you don’t. Start as a “pre-beginner” by mastering the prerequisites: build core strength, practice backflips onto soft mats, and drill the hitch kick. Your first “beginner” step is Phase 1 of the practice progression: learning to land safely from the jumping motion without a ball.
How difficult is a bicycle kick?
Extremely. The primary coaching source calls it “very dramatic and very difficult to perform.” It requires the air awareness of a gymnast, the timing of a striker, and the courage to commit to a backwards fall. It’s a low-percentage skill even for professionals.
Why can’t I do a bicycle kick?
There are likely three gaps: physical, technical, or mental. Physically, you might lack the core strength or flexibility. Technically, you’re probably skipping the prerequisites like the hitch kick. Mentally, the fear of falling backwards is a powerful blocker—that’s why you must drill the landing on a soft surface until it’s boring.
What’s the difference between a bicycle kick and a scissor kick?
In common usage, they are often different names for the same skill. The Coaching American Soccer manual lists “scissor kick” as an alternative name for the bicycle kick, noting the slicing motion of the legs resembles scissors. Some purists argue a scissor kick is a sideways volley, but the primary source for this technique treats them as synonyms.
Before You Go
The most important rule isn’t in the steps. It’s the one the manual repeats: “Do not try to force your body to do something it can’t do.” This skill reveals itself over months, not minutes. The players who pull it off in games have logged countless hours on soft mats, building the muscle memory so the movement isn’t a thought but a reaction.
So start with the fall. Master the landing. The kick will come later. And when you see that perfect, acrobatic goal on TV, you’ll appreciate the invisible foundation of safe practice that made it possible.
