
How to Curve a Football: The 6-Step Technique
This post contains affiliate links. As an Amazon Associate, we earn from qualifying purchases.
To curve a football, you must strike the ball off-center with the inside or outside of your foot to apply spin, while hitting below its midline to add loft. The most suitable offset distance between your foot and the ball’s axis for maximum spin is around 100 mm. Contact is brief, about 0.147 meters, and the resulting spin creates a pressure differential in the air (the Magnus Effect) that bends the ball’s flight path.
That 100-millimeter offset is the biomechanical sweet spot most guides on how to curve a football don’t mention. It’s not about kicking harder; it’s about placing your foot precisely that far from the ball’s centerline to maximize rotation without sacrificing all your power. Get that wrong, and your shot might have pace but no bend, or spin but no distance.
What follows is a breakdown of the physics that makes the ball swerve, the step-by-step technique to apply it, and the drills to make bending second nature, whether you’re taking a free-kick or whipping in a cross.
Key Takeaways
- Strike the ball with a 100 mm offset from its center for optimal spin, a spec from peer-reviewed biomechanics research.
- For an inside curve, use the inside-instep of your foot; for an outside curve (trivela), use the outside-instep.
- Lock your ankle and follow through across your body, this continuation of motion is what seals the spin onto the ball.
- Understand the trade-off between speed and spin; a wider offset creates more rotation but can rob the shot of pace.
- Practice the technique stationary first, then incorporate movement and targets, focusing on consistent contact point above all.
The Physics of the Bend: It’s Not Magic, It’s Magnus
When learning how to curve a football, understand the ball curves because of the Magnus Effect. When you strike the ball off-center, you make it spin. That spin drags air around it, creating lower air pressure on the side spinning in the direction of the flight and higher pressure on the opposite side. The ball gets pushed from the high-pressure side toward the low-pressure side, bending its path in mid-air.
The curved flight is due to the Magnus Effect, where spin alters air pressure around the ball. On one side the air pressure is decreased, while on the other side the air pressure is increased, pushing the ball sideways.
A strike on the right side of the ball causes it to spin counter-clockwise and curve left. A strike on the left side makes it spin clockwise and curve right. The faster the spin, the more pronounced the bend. This is why a perfectly struck free-kick seems to defy physics.
The 6-Step Technique for a Classic Inside Curve
Here is how the most common bend works: the in-swinger with your right foot, curving left. Reverse the foot and contact point for a left-footed shot.
1. Approach Angle: Don’t run straight at the ball. Approach from a slight angle. Your body should be slightly open, shoulders facing where you want the ball to start its journey. 2. Plant Your Standing Foot: Place your non-kicking foot to the side of the ball, pointed in the direction of your initial target. If your foot is too close, you won’t get the swinging leg motion needed for spin. 3. Ankle and Foot Position: This is the make-or-break detail. Lock your ankle. For an inside curve, turn your ankle outward so the front of your foot angles down at the big toe. The contact surface is the inside-instep, the bony ridge just above the arch, not the flat inside of the foot. 4. The Strike: Aim to make contact with the lower-right quadrant of the ball. Your foot should sweep across the ball, not through it. The key measurement from a Sports Engineering study is an offset of about 100 mm from the ball’s central axis. 5. Follow Through: Your leg must continue its sweeping motion across your body. If you stop your leg at the ball, you’ll kill the spin. Let your kicking foot finish high and across your torso. 6. The Outcome: A well-struck ball will launch with a low-to-medium trajectory, spinning counter-clockwise. It will initially head right of your target before bending back left.
Inside Curve vs. Outside Curve (The Trivela)
When learning how to curve a football, you have two main tools for bending: the inside of your foot and the outside. They produce different types of swerve and are useful in different situations.
| Curve Type | Foot Surface Used | Ball Contact Point | Resulting Curve (Right Foot) | Best For |
|---|---|---|---|---|
| Inside Curve (In-swinger) | Inside-instep | Lower-right quadrant | Curves left | Crosses, free-kicks around a wall, predictable bending passes. |
| Outside Curve (Out-swinger / Trivela) | Outside-instep | Lower-left quadrant | Curves right | Surprise passes, shots when the ball is on your wrong side, less predictable delivery. |
The outside curve, or trivela, is trickier. It uses the outside-instep of your foot, the bone along the little toe, to strike the opposite side of the ball. The ankle lock is even more critical here to avoid a weak, glancing blow. The ball often bends more sharply but with less power. It’s a technique used by some professional players.
Where this goes sideways: Trying to use the flat inside of your foot instead of the inside-instep ridge. The flat surface slides off the ball, producing a weak, spinning shot that floats harmlessly wide.
The Biomechanics Your Coach Doesn’t Teach You
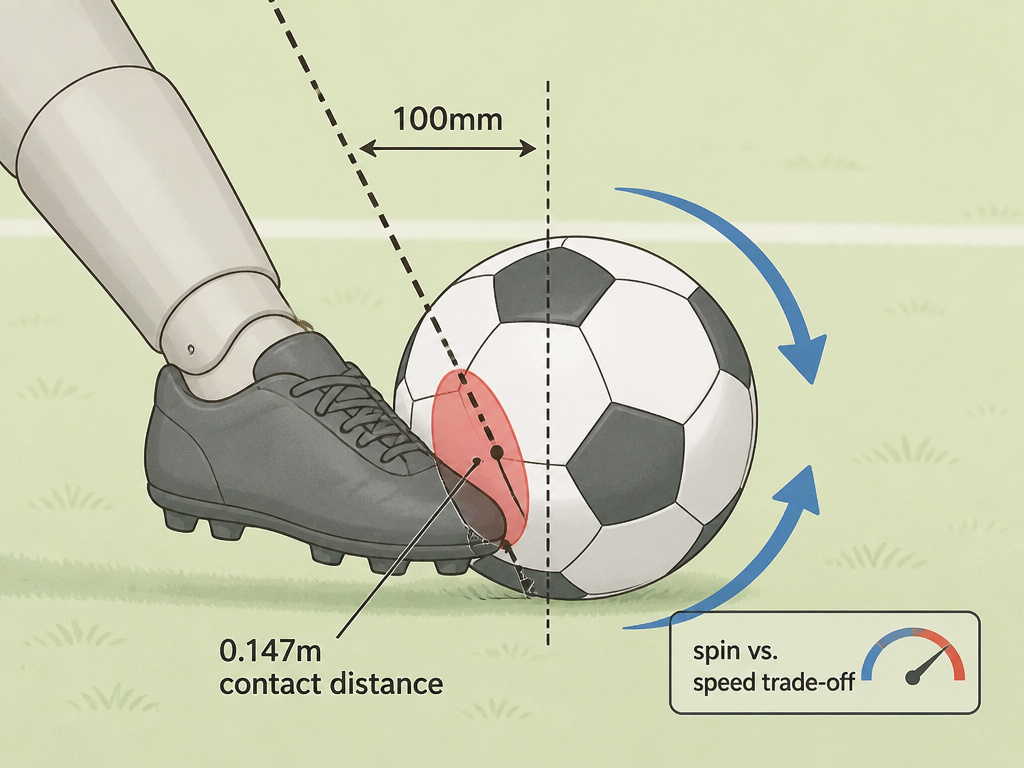
The coaching advice is good, but the peer-reviewed research adds a layer of precision. A high-speed video study published in Sports Engineering analyzed the impact and found some critical numbers.
First, contact is incredibly brief. The mean contact distance between foot and ball is 0.147 meters, and the foot finishes its contact before it has moved the length of the ball’s diameter (about 0.223 m). The whole imparting-of-spin happens in a blink.
Second, the study quantified the offset distance. The most suitable offset between the foot and the ball’s axis to produce the largest rotation is around 100 mm. That’s the sweet spot your body learns through repetition.
Finally, the research identified a clear trade-off between ball speed and spin. As you increase the offset to get more bend, you often sacrifice raw shot power. You have to choose based on the situation: lots of spin to bend around a wall, or more pace to beat a keeper at the near post.
Does Your Boot’s Grip Even Matter? Science vs. Coaching Lore
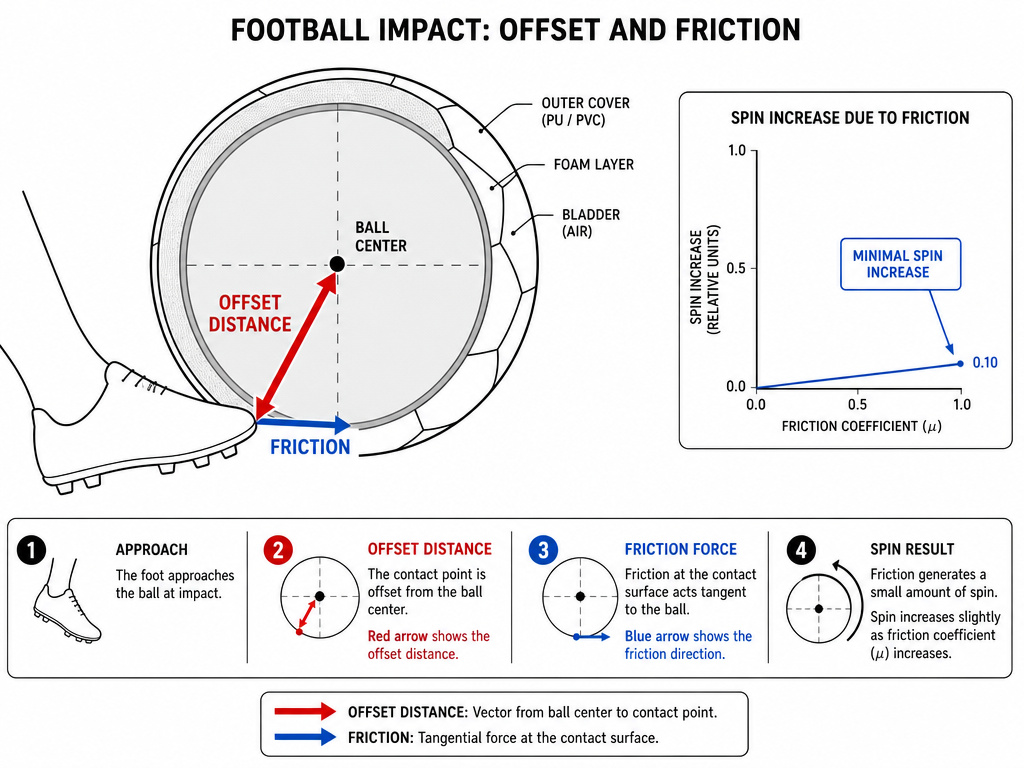
Here’s a fascinating conflict. Coaching guides, like the one from Coaching American Soccer, emphasize that ‘the laces be involved because they promote a better grip on the ball,’ suggesting material and friction are critical. However, a study in Scientific Reports concluded that the coefficient of friction between the shoe upper and the ball had little effect and does not significantly influence ball behaviour.
However, a peer-reviewed simulation study in Scientific Reports came to a different conclusion. It found that the Young’s modulus (stiffness) of the shoe upper and the coefficient of friction between the shoe and ball had little effect and does not significantly influence ball behaviour.
A peer-reviewed simulation study in Scientific Reports set the coefficient of friction between the foot model and the ball model at 0.4 and concluded that shoe upper properties had little significant effect on launch angle, velocity, or rotation.
How do we reconcile this? The Sports Engineering study adds nuance: varying the coefficient of friction from 0.0 to 1.0 can increase spin by up to 13 rad/s, but the offset distance affects spin more than friction does. The science says precise foot placement is vastly more important than wearing a specific “grippy” boot. The feel of a textured Predator or Tiempo might boost confidence, but the technique is what actually bends the ball.
How to Practice: Drills That Build Muscle Memory
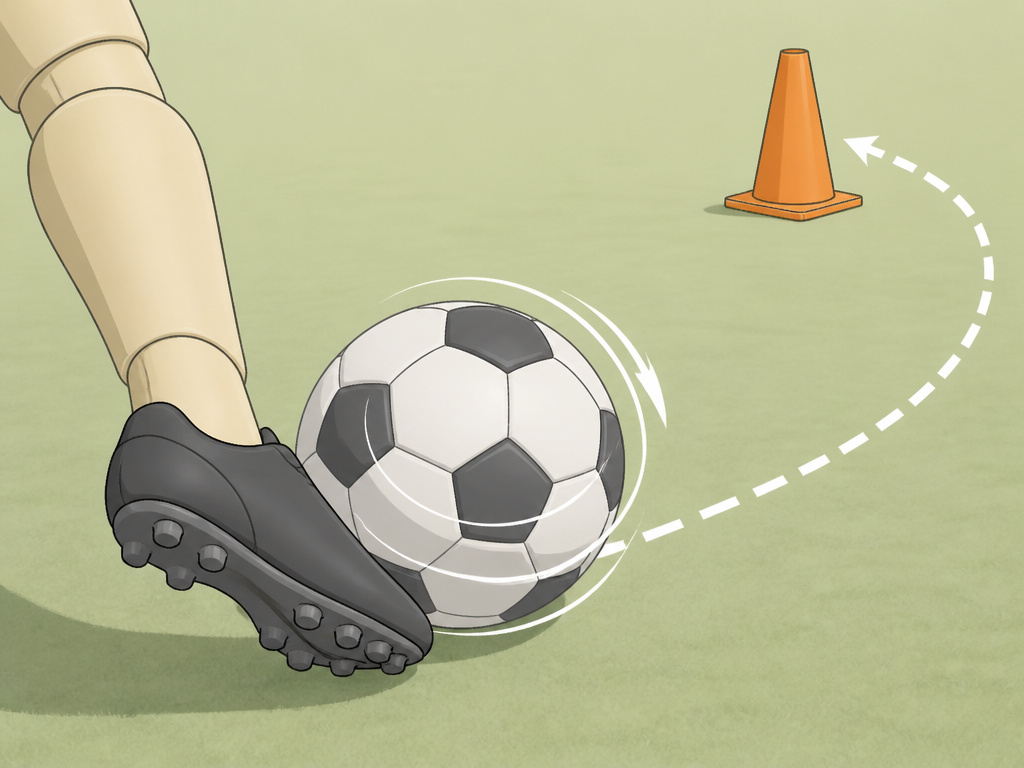
You can’t just understand it; you have to do it. Here are progressive drills that move from technique to game realism.
Stationary Target Practice: Start with the ball still. Place a cone at a short distance away. Don’t aim at the cone. Aim to its side and practice curving the ball around it to hit the cone. Focus entirely on your foot position and the sweeping follow-through. Do repetitions with your right foot, then with your left.
The Moving Cross: Have a partner stand at the edge of the penalty area. You start with the ball near the corner of the 18-yard box and dribble along the edge toward the end line. As you move, practice whipping in an out-swinging cross (curling away from the goal) for your partner to attack. This drill teaches you to curve the ball while in motion.
Free-Kick Simulation: Set up a wall of mannequins or backpacks 10 yards from a goal. Place the ball centrally. Practice striking it with enough spin to bend around the wall and back on target. Start with a large gap, then move the wall closer to the ball to challenge yourself. This is where you feel the speed vs. Spin trade-off firsthand.
Solo Wall Work: If you’re alone, find a wall. Strike the ball against it so it rebounds back to you at an angle. Your first touch should set the ball slightly to your side, and your second touch is a curved shot or pass aimed at a specific brick or marking. It’s repetitive, but it builds consistency faster than anything else.
Common Mistakes and How to Fix Them
The Ball Doesn’t Curve: You’re striking too close to the center. You’re making solid contact, but without the essential offset. Focus on that 100 mm visual. Imagine a line through the middle of the ball and aim to make contact with an offset of about 100 mm from it.
The Ball Spins but Has No Power: You’re likely “slapping” the ball with a loose ankle or using the wrong part of your foot. Lock your ankle rigidly and ensure you’re using the bony inside-instep ridge. Your follow-through is probably also stopping at the ball.
The Ball Sails High Over the Bar: You’re leaning back as you strike or making contact too far under the ball. Keep your chest over the ball and strike the lower quadrant, not the very bottom. Remember, you need loft, not a skyward launch.
Inconsistent Results: You’re not practicing the exact same technique each time. Film yourself on your phone. Compare your foot position, plant foot location, and follow-through from rep to rep. The difference will be obvious.
How Curving Differs From a Knuckleball
A curve kick and a knuckleball are opposite techniques. Curving a ball requires you to apply maximum spin by striking it off-center, often with the inside of your foot, to create a consistent curved flight. The faster the spin, the more pronounced the bend. In contrast, a knuckleball aims for almost no spin, causing unpredictable wobbling in the air. The contact for a curve is also different; the foot brushes across the ball to generate rotation, finishing the motion before the foot moves the distance of the ball’s diameter. For a knuckleball, the point of contact is more central and rigid, deliberately avoiding any sweeping follow-through.
Frequently Asked Questions
What part of the foot should I use to curve a football?
Use the inside-instep (the bony ridge above your arch) for a classic in-swinging curve. Use the outside-instep (the bone along your little toe) for an out-swinging curve or trivela. The flat parts of your foot lack the structure to impart clean spin.
Can beginners learn to curve a football quickly?
Beginners can learn the basic motion quickly, but mastering consistent, powerful bend takes patience. Start with stationary balls, focus solely on foot placement and locked ankle, and don’t expect perfect results in your first session. It’s a feel-based skill.
Why does my curved shot lack power?
Power comes from the leg swing and solid contact, as detailed in our guide to shooting with power. If your shot is weak, you’re probably stopping your follow-through or your ankle is collapsing on impact. Practice the full motion: accelerate your leg through the ball and let it follow through completely across your body.
Is curving the ball more important for free kicks or open play?
Both. Free kicks showcase the dramatic bend, but curving is equally vital in open play. A curved pass around a defender, an out-swinging cross away from the keeper, or a bent shot from the edge of the box are all high-value applications that change games.
Before You Go
The real secret isn’t in your boots. It’s in the 100-millimeter offset and the locked ankle. Chase those two things in your next practice session. Set up ten balls and don’t move on until you’ve struck each one with the same specific part of your foot, sweeping through each time.
One rule most guides skip: if you’re not getting any bend after twenty tries, stop trying to add power. Strip it back. Stand five yards from a fence and just tap the ball, focusing only on creating spin. Power comes later, after the spin becomes automatic. That’s the progression that works.
Now, get a ball and find a wall. The theory is fine, but the bend only happens when you do.
