
How to Wash Goalkeeper Gloves: Step-by-Step (No Machine)
This post contains affiliate links. As an Amazon Associate, we earn from qualifying purchases.
To wash goalkeeper gloves, hand wash them in lukewarm water (max 30°C/86°F) immediately after use. Use a mild, glove-specific cleaner or just water, gently massage the latex with your thumbs, and rinse thoroughly. Squeeze, don’t twist, excess water out, then press them in a towel before air-drying away from heat and sunlight. Never use a washing machine, brushes, or harsh soaps.
This process is about physics, not just cleanliness. Latex is a porous, elastic material that gets its grip from a tacky surface and internal moisture. Hot water, agitation, and chemicals strip that moisture away, leaving the palm hard and slick. The goal isn’t a sterile wash; it’s preserving the latex’s natural properties so it stays alive for the next save, which is a core part of learning how to make goalkeeper gloves last longer. Understanding how to wash goalkeeper gloves is key to this preservation; for a detailed step-by-step guide, see our article on how to clean goalkeeper gloves.
What follows is the method used by pros and manufacturers, broken down into the why behind each step. The guide explains the essential hand-wash routine, the critical drying phase where most gloves are ruined, and how to handle special cases like new gloves or artificial turf wear.
Key Takeaways
- Wash gloves immediately after use in lukewarm water (max 30°C). Letting dirt dry bakes it into the latex pores, killing grip permanently.
- Never use a washing machine or dryer unless the manufacturer explicitly states the gloves are machine washable. The spin cycle degrades latex and loosens stitching, turning premium gloves into practice pairs.
- Dry by wrapping in a towel and applying pressure, then air-dry away from direct heat or sun. A radiator can make latex brittle.
- Pre-wash new gloves before their first use to remove factory preservatives and activate the latex for maximum grip from the start.
- Store gloves in a cool, slightly moist environment after they are completely dry. A sealed bag or damp kit bag will grow mold.
Why Your Current Method is Probably Wrong
I learned this the hard way. My first decent pair of gloves were a mid-range Reusch model. After matches, I’d toss them in the kit bag with my sweaty shirt and socks. A day later, I’d pull them out and chuck them in the washing machine on a gentle cycle, then leave them on a radiator to dry quickly. Within a month, the palms were smooth, hard, and crumbly at the edges. They looked clean but felt like plastic bags. I’d followed the logic for clothes and destroyed a specialized tool.
That experience lines up with every manufacturer’s warning. Machine washing is not recommended by brands like Storelli and AB1GK because it degrades latex, loosens stitching, and flattens the grip foam. The spin cycle acts like a mild grinder. Heat from a dryer or radiator does the same job in less time, pulling all the natural moisture from the latex polymer chains. Once that moisture is gone, it doesn’t come back, which is why the how to wash goalkeeper gloves question is so important. The glove is dead.
The right method is slower and more deliberate. It treats the latex like a living skin that needs to stay supple. It’s not about achieving hospital-level sterility; it’s about removing mud, sweat, and bacteria without stripping the essential oils and water content from the palm, which is the core of how to wash goalkeeper gloves. That’s the balance.
The 5-Step Hand Wash Method (No Machine)
This is the core routine. The timeline is tight: wash immediately after the match if you can. AB1GK notes this prevents dirt from drying into the latex and reduces bacteria. If you can’t do it right away, at least give them a light rinse to stop the mud from setting.
The 30°C Rule: Every manufacturer guide. AB1GK, PREMIERGK1, and The One Glove specify a maximum wash water temperature of 30°C (86°F). Storelli recommends lukewarm water. Hotter water breaks down the latex bonds, accelerating wear and reducing tackiness. Lukewarm is the sweet spot.
Step 1: Prepare Lukewarm Water and Optional Cleaner
Fill a sink or basin with lukewarm water. If you’re using a cleaner, have it ready. Here’s where sources disagree. Reusch explicitly markets its Reusch Glove Wash, advising 4-6 sprays per glove. The One Glove mentions its OG Elixir (3-4 pumps per palm) and notes that water will also work. Brave GK warns against regular soaps and dish gels, advising “professional tools” instead. PREMIERGK1 cautions that glove cleaner left on can potentially cause damage and must be rinsed off completely. Sources disagree on whether to use a specific glove wash product or just water. Reusch and Brave GK recommend specific products, while AB1GK and The One Glove indicate water alone can be sufficient. For heavy mud or odor, a glove-specific wash is a safe bet according to some sources. Never use standard detergent, shampoo, or dish soap.
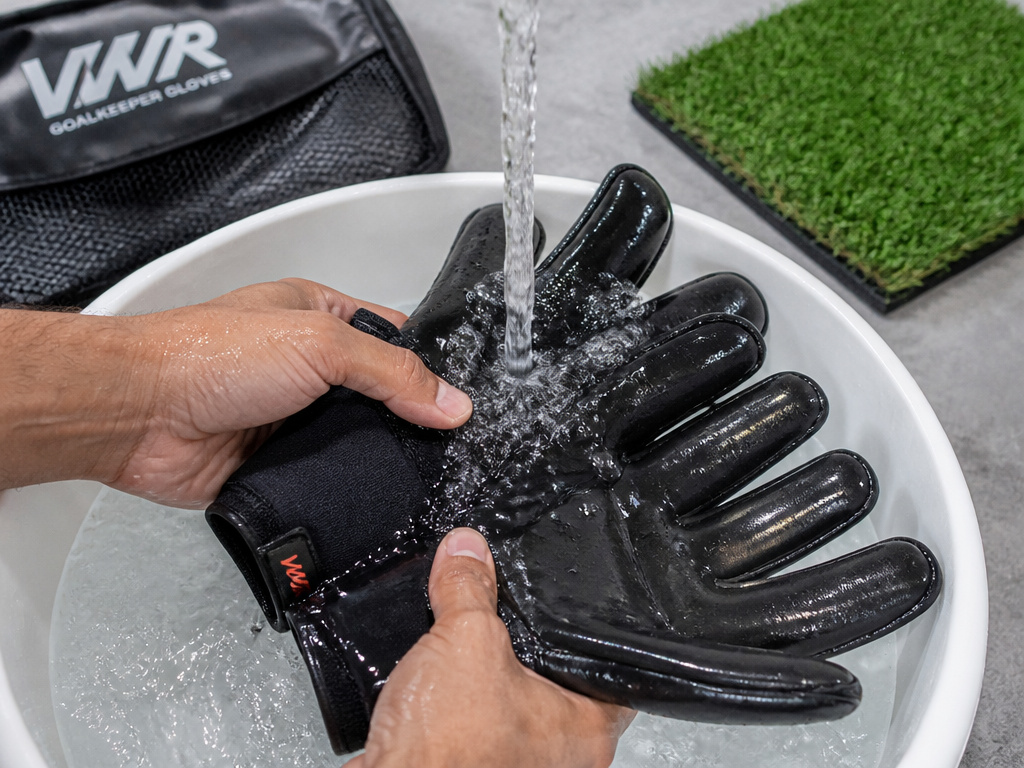
Step 2: Submerge and Gently Agitate
Soak the gloves. Storelli recommends soaking gloves in lukewarm water for 10–15 minutes. Then, with the gloves on your hands or off, gently massage the latex. Sources disagree on how to clean the gloves. PREMIERGK1 and The One Glove advise using your thumbs to rub dirt off lightly, while Storelli and AB1GK say not to scrub or use any ‘scrubber’. PREMIERGK1 and The One Glove advise using your thumbs to rub dirt off lightly. Storelli says do not scrub gloves, and AB1GK says do not use any form of ‘scrubber’. The goal is to dislodge dirt, not scour the surface. You’ll feel the difference. Proper latex has a slight give. Scrubbing too hard can tear the latex surface.
Step 3: Rinse Thoroughly
Hold the gloves under a lukewarm tap and rinse until the water runs completely clear. This step is mandatory if you used any cleaner. Any residue left in the pores will dry into a film that blocks grip. Squeeze the gloves under the water to flush out the lining.
Step 4: Remove Excess Water (The Right Way)
This is a critical moment. Do not wring the gloves like a towel. Storelli and Brave GK explicitly say do not wring or twist. The One Glove instructs to squeeze (don’t twist!). Twisting can damage the latex and stitching. Instead, press the gloves between your palms, working from the wrist toward the fingers, pushing water out.
Step 5: Immediate Towel Press
Before air-drying, you need to remove as much surface water as possible. AB1GK has the most vivid method: wrap the gloves in a dry towel and apply pressure “with either your hands (or even your feet) combined with your body weight.” PREMIERGK1 and The One Glove also recommend wrapping in a towel and applying pressure. The key is pressure, not wiping. Wiping can tear delicate latex.
| Step | Action | Why It Matters |
|---|---|---|
| 1. Prepare | Lukewarm water (max 30°C), optional glove wash. | Hot water breaks down latex. Harsh soaps leave residue. |
| 2. Wash | Soak 10-15 min, massage with thumbs only. | Loosens dirt without abrasive damage. Brushes tear foam. |
| 3. Rinse | Rinse under tap until water runs clear. | Removes all dirt and cleaner residue that kills grip. |
| 4. Squeeze | Press gloves palm-to-palm; do not twist. | Twisting stretches latex and stitching, ruining the fit. |
| 5. Towel Press | Wrap in dry towel, apply firm pressure. | Speeds drying, prevents waterlogging which causes mildew. |
The Latex Killer: A Drying Mistake Timeline
Drying is where the lifespan of your gloves is decided. It’s a passive process, which makes it easy to get wrong. The enemy is heat and stagnant air.
Common mistake: Drying gloves on a radiator or in direct sun. The latex loses its natural moisture, turning dry and brittle. This damage is often irreversible.
Hour 0-1: After the towel press, your gloves are damp, not wet. The latex should feel cool and supple.
Hour 1-3 (The Danger Zone): This is when impatience strikes. Putting gloves on a radiator, in front of a heater, or using a hairdryer seems logical. Never use a dryer, radiator, hairdryer, or heater, as Storelli puts it. The heat doesn’t just dry the surface; it cooks the internal moisture out of the latex foam. The heat causes the latex to break down. The palm will start to feel stiff.
Hour 12-24 (The Safe Path): Air-dry at normal room temperature. Air dry gloves at normal room temperature. Avoid humid environments like a steamy bathroom, as PREMIERGK1 and The One Glove note this can cause mold. Expect it to take around a day.
The Storage Deadline: Before you even think about storage, they must be completely dry. AB1GK says allow them to dry overnight naturally before placing in a glove wallet. The One Glove recommends leaving them for around 24 hours before placing them in a glove wallet. Storelli warns not to put gloves in closed containers or glove bags during drying.
Pre-Wash, Storage, and Special Cases
The work isn’t done when the gloves are dry. A few extra routines make a big difference over a season.
Activating New Gloves
Don’t use brand-new gloves straight out of the package. AB1GK, PREMIERGK1, and The One Glove all recommend a pre-wash before first use. This removes factory preservatives and activates the latex by hydrating it. PREMIERGK1 even suggests a second pre-wash for absolute confidence. This step ensures you get the maximum grip from the first wear.
Storing for Longevity
Once dry, store them properly. AB1GK advises a cool and reasonably moist environment, not wet. A dry glove left in a hot environment can become brittle. A slightly damp glove sealed in a bag will grow mold. The solution is to store gloves in a cool and reasonably moist environment. Avoid storing any gloves without washing them first, as unwashed sweat and dirt will slowly degrade the materials.
The Artificial Turf Problem
This is a major wear factor most guides mention but don’t emphasize enough. PREMIERGK1 and The One Glove state that standard gloves are predominantly designed for natural surfaces. Using them on 3G or astro turf places a higher level of stress on the latex, causing it to wear much quicker. If you play on artificial surfaces often, factor in a shorter glove lifespan or choose a turf-specific model.
What About the Smelly Lining?
Most guides focus on the palm, but the interior absorbs sweat, much like the hygiene considerations for how to clean shin guards.
How to dampen goalkeeper gloves for better grip
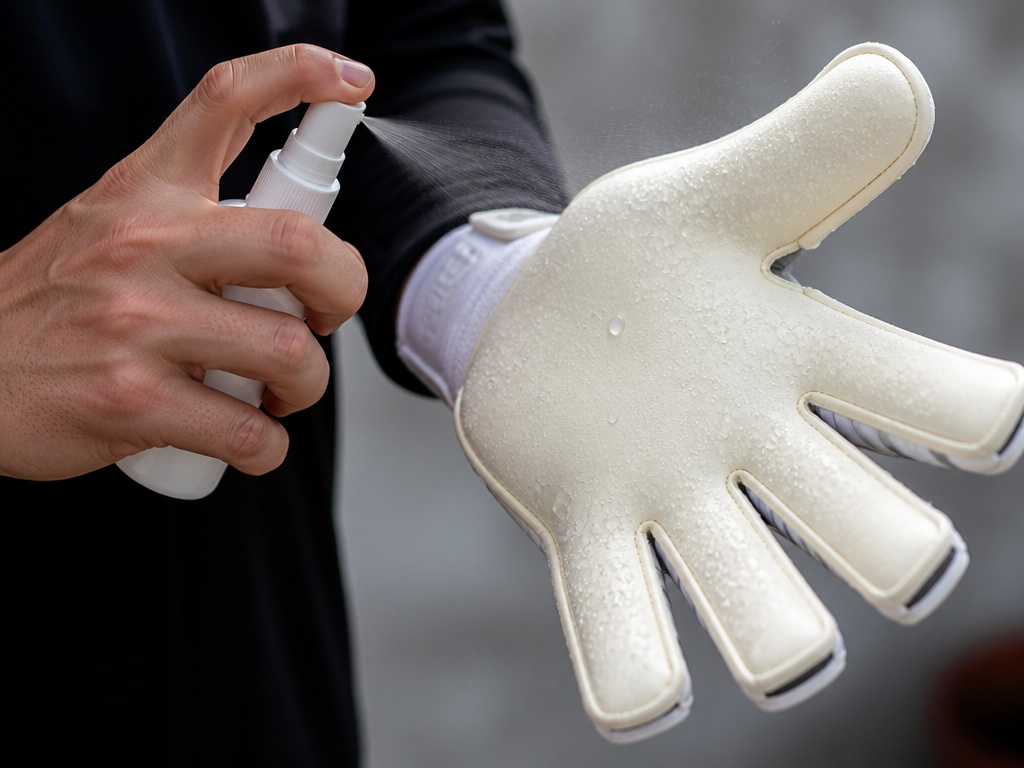
Dampening the palms of your gloves before playing is a standard practice to improve grip and durability. This simple step activates the latex, making it more tacky and responsive to the ball. Use plain water to lightly moisten the palm surfaces. Do not soak the gloves; a light spray or quick rinse is sufficient. The goal is to create a slight dampness that enhances the natural properties of the latex without oversaturating the material. This technique is recommended for use during play to maintain optimal performance. It is a straightforward part of glove preparation that can make a noticeable difference in handling and control.
Frequently Asked Questions
Can I use Dawn dish soap to wash my goalie gloves?
Most manufacturers advise against it. Brave GK specifically says do not use regular shampoos, washing powders, or dishwashing gels. These contain degreasers and surfactants that strip the natural oils from latex, leaving it dry. Water or a glove-specific wash is far safer.
Is it okay to wash gloves in the washing machine?
The overwhelming advice is no. Storelli, AB1GK, and others do not recommend machine washing, as it degrades latex and stitching. However, Brave GK notes that some gloves are machine washable if the manufacturer explicitly says so. If the manufacturer explicitly states the gloves are machine washable, Brave GK advises turning them inside out, placing them in a pillowcase, and washing in delicate mode with mild detergent. This is a last resort, not a routine.
What is the best product for washing goalkeeper gloves?
There is no single “best” product, as brands design their own. Reusch Glove Wash and The One Glove OG Elixir are two dedicated options. The best practice is to use the cleaner recommended by your glove’s manufacturer, if they have one. Otherwise, lukewarm water alone is effective and risk-free, as several guides confirm.
How often should I wash my goalkeeper gloves?
Storelli provides the clearest guidance: a full clean is typically needed after two or three matches. In between, a light rinse is sufficient. Washing after every single session can be overkill, but you should never store them dirty. Let the level of dirt and smell be your guide, if you can see or smell it, it’s time for a wash.
Can I speed up drying for back-to-back games?
Yes, but without heat. After the initial towel press, place the gloves in front of a fan or in a well-ventilated, air-conditioned room. Do not compromise on this, fast and hot ruins gloves; fast with airflow is safe.
Before You Go
The one habit that changes everything is the post-match routine. Don’t zip them into your bag. Take five minutes, run the sink, and rinse the worst of the dirt off. That single act prevents the set-in grime that requires harsh cleaning later.
If you play on artificial turf, accept that your gloves are in a higher-stress environment and will wear faster. No amount of perfect washing will change that material fact. Your care routine on turf is about damage limitation, not immortality.
And finally, trust the feel. Latex in good condition is tacky and slightly soft. If your palms are smooth, hard, or crumbly, the drying process has already failed. That’s your signal to check your radiator, your sunny windowsill, or that “gentle” machine cycle you thought was safe. The gloves are telling you what happened. Listen to them.
