
How to Inflate a Football: Step-by-Step (Without Damage)
This post contains affiliate links. As an Amazon Associate, we earn from qualifying purchases.
To inflate a football, you need a pump with a pressure gauge and a compatible inflation needle. The correct pressure is printed near the valve, typically between 0.6–1.1 bar (8.7–16.0 psi). Lubricate the needle, insert it straight into the valve, pump slowly to the lower end of the recommended range, and check with a gauge. Inflate at least 24 hours before use to let the ball settle.
That last detail about the 24-hour settle time is the part most guides treat as an afterthought. It comes straight from Mitre’s official care sheet, and it’s there because the bladder and casing need time to stretch into their final, true shape. Skip it, and the ball can feel dead or roll unevenly on its first outing.
What follows is the full breakdown: the tools you actually need, the manufacturer disagreements on lubricants you won’t find elsewhere, and how to avoid the two mistakes that permanently damage a ball’s bladder when you ignore the proper steps for how to inflate a football.
Key Takeaways
- Always use a pressure gauge, guessing by feel leads to over- or under-inflation, which changes how the ball moves and wears it out faster.
- Inflate to the lower end of the pressure range printed near the valve; this gives a better touch and accounts for air expansion on a warm day.
- Lubricate the needle before every insertion, whether with glycerine, silicone oil, or water, to prevent tearing the valve and causing a slow leak.
- Inflate slowly and let the ball settle for at least 24 hours before serious use; rapid pumping can trap the bladder inside the casing.
- For long-term storage, reduce the pressure by about half and keep the ball in a dry, room-temperature place to prevent internal moisture damage.
The Standard Step-by-Step (With the One Step Nobody Skips)
You have the ball, a pump, and a needle. The basic sequence is simple, but one step in the middle is the difference between a ball that lasts seasons and one that starts leaking in weeks.
First, if the ball is completely flat, don’t just start pumping. Unfold it with both hands and give it a shake. You’re trying to hear the bladder, the inner rubber tube, rattle loosely inside. If it’s stuck against the valve, a few firm taps on the opposite side of the ball will shift it away. This prevents you from spearing the bladder with the needle tip on your first push.
Insert the needle straight into the valve, rotating it slightly left and right without force. A football valve is a simple rubber grommet designed to seal around a narrow needle; angling the needle or using excessive pressure folds and cuts the rubber, creating a permanent leak path that no amount of lubricant will fix.
Now, the step everyone rushes: lubrication. You must moisten the needle. The debate on what to use is real. Mitre says use their glycerine, Sport-Thieme suggests valve oil or even soap, and many coaches just use water. The common goal is to reduce friction. A dry needle drags against the valve rubber every time you insert and remove it, wearing a microscopic groove. Do that twenty times, and the valve won’t seal tightly anymore. Dip the tip in your chosen lubricant, then push it in.
Attach your pump and start inflating. The key word is slowly. Listen to the sound. A healthy, slow inflation has a steady, low hiss. If you’re pumping frantically and hear a sharp, rhythmic puffing, you’re going too fast.
Stop well before the ball feels hard. This is where you must use the gauge. Pump in short bursts, check the pressure, and repeat. Once you hit the lower number in the printed range, stop. Pull the needle out in one smooth, quick motion to minimize air loss.
Finally, walk away. Let the ball sit for a day. During this time, the bladder expands evenly against the inner lining of the ball. A ball used straight after inflation often has a slightly dead spot for the first hour of play.
What Pressure Should a Football Be?
The answer is on the ball. Look near the valve stem, and you’ll find the manufacturer’s recommended pressure range stamped or printed. If the printing is worn off, you’re not completely in the dark on the how to inflate a football question, but you are in a zone where a general guideline is your best guess, not a rule.
For a standard size 5 football, the consensus range is 0.6 to 1.1 bar (8.7 to 16.0 psi). The Sport-Thieme guide narrows it further to 0.7–0.9 bar (10–13 psi) for regular footballs. The variance accounts for different materials, bladder types, and even player preference. A lower pressure within the range gives a softer touch and is easier to control, especially for younger players. A higher pressure makes the ball faster and bouncier, which some advanced players prefer.
The problem with guessing is that feel is unreliable. Your perception changes with the weather and your own strength. A ball that feels perfect in a cool garage will be over-inflated and rock-hard after twenty minutes in the sun. The air inside expands.
| Ball Type | Recommended Pressure (Bar) | Recommended Pressure (PSI) | Best For |
|---|---|---|---|
| Standard Football | 0.7 – 0.9 | 10 – 13 | Most match and training use |
| Light Football | 0.4 – 0.7 | 5 – 10 | Younger age groups (size 4) |
| Futsal Ball | 0.4 – 0.6 | 5 – 9 | Indoor hard-court play |
| Indoor Football | 0.6 – 0.7 | 9 – 10 | Indoor turf or gym surfaces |
The Mitre guide adds a crucial tip: inflate to the lower end of your ball’s printed range. It’s a margin of safety for temperature changes and ensures the bladder isn’t constantly under maximum stress. A ball consistently kept at the top of its range will lose its shape faster, the stitches and panels are under more tension with every kick.
The Tool You Can’t Skip (And the One You Can)
Your pump is straightforward. A simple hand pump with a built-in gauge is the reliable standard. Electric pumps are fine, but the faster air delivery makes it easier to overshoot your pressure if you’re not careful. The real focus should be on the interface between the pump and the ball: the needle and hose.
Sport-Thieme identifies three main types of valve needles and adapters. Getting the wrong one means you can’t even start.
- Standard valve needles for needle valves (footballs, basketballs).
- Special needles for specific pump models like the Quick Mini Pump.
- Adapters for balls with a stopper valve, like large fitness balls.
Common mistake: Using a bike pump without the correct needle adapter. The nozzle is too wide and will crush the valve, likely breaking the seal in one go. The connection is always needle-to-valve, not nozzle-to-valve.
More important than the pump type is the hose. A rigid pump connected directly to a needle transfers all your wobbling force straight to the valve. Sport-Thieme recommends using a flexible hose between the pump and the needle. This little piece of tubing absorbs the movement, stopping the needle from bending or levering sideways in the valve and damaging it. It’s a cheap accessory that prevents the most common physical damage to the valve.
If you don’t have a football pump at all, you have options, but they’re compromises. A bike pump with a presta valve adapter can sometimes work if you also have a separate football needle that fits into the adapter. It’s fiddly. In a real pinch, some air compressors have a blowgun attachment that can be fitted with a needle. The risk here is immense pressure delivered instantly, you must use a pressure regulator and be ready to stop in a fraction of a second. It’s not recommended.
Lubricant Wars: Glycerine, Silicone, or Water?
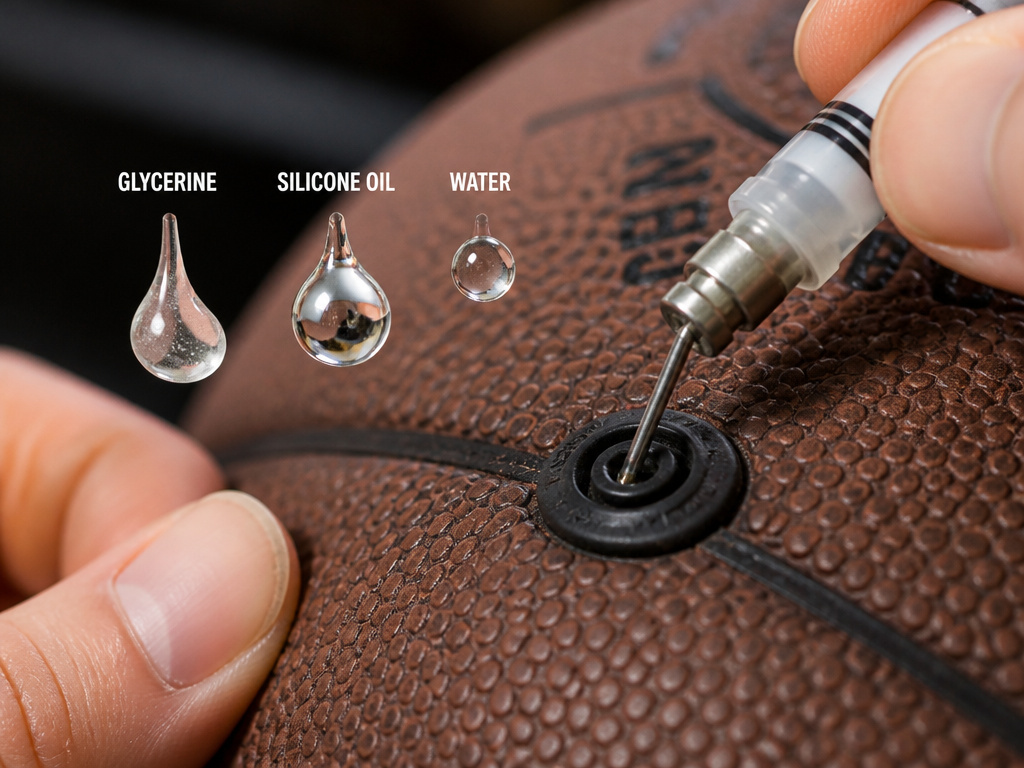
Here’s where the manufacturer guides stop agreeing. This isn’t a matter of right and wrong, but of different material science priorities. Your choice has consequences for the valve’s rubber.
- Mitre mandates “Mitre glycerine” and issues a specific warning: “Never use mineral oils… As they contain detergents harmful to rubber.” Glycerine is a thick, non-detergent lubricant that coats and protects the rubber.
- Sport-Thieme suggests “valve oil or alternatively soap or saliva.” Valve oil is typically a thin mineral oil, which contradicts Mitre’s warning.
- Titan Sportz and WikiHow offer the common pragmatic solution: a drop of silicone oil or simply dipping the needle in water.
So who’s right? It depends on what your valve is made of. Traditional rubber valves benefit from glycerine’s protective coating. Some modern synthetic valves are compatible with light oils. Water works in a pinch because it reduces initial friction, but it doesn’t protect the rubber and can promote mildew if the valve area stays damp.
The safe, universal choice is a drop of silicone oil or glycerine. Both are inert and won’t degrade common valve rubbers. Avoid general-purpose household oils (like WD-40 or 3-in-1 oil) as they can contain solvents. The one rule every source agrees on: lubricate every single time. This essential habit extends valve life.
Where This Goes Sideways: Bladder Traps and Hydrolysis
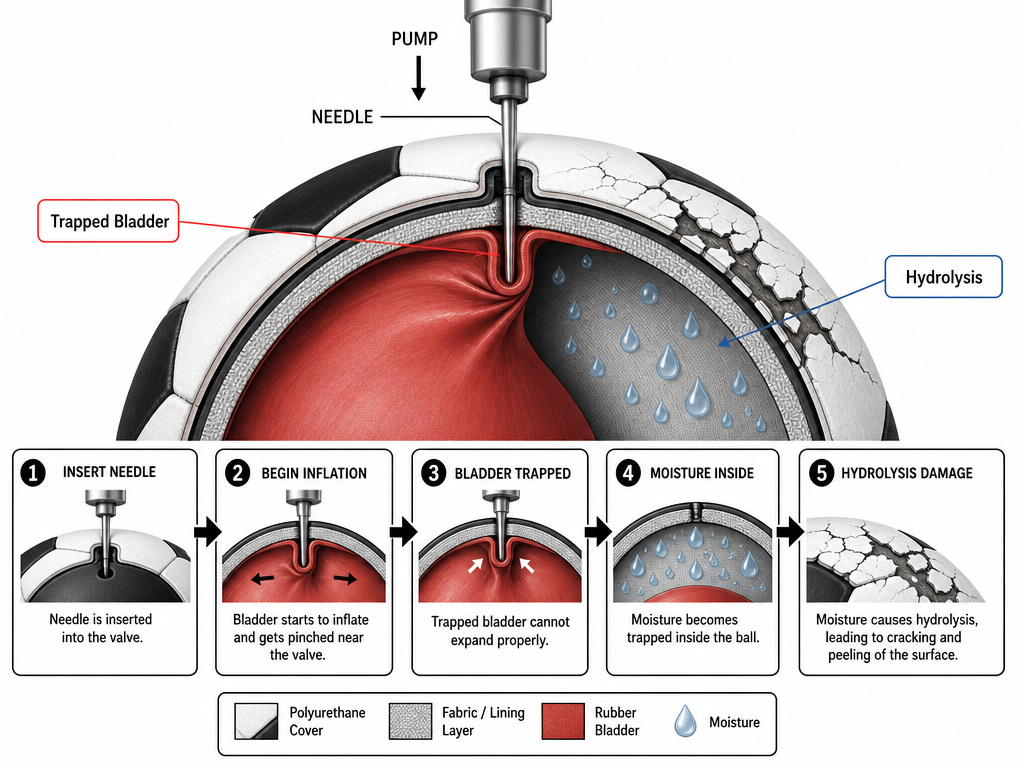
Two failures happen out of sight, inside the ball. You can follow every step correctly and still end up with a ruined ball if you miss these.
The first is the trapped bladder. Mitre’s guide states directly: “Rapid inflation may cause the bladder to get trapped within the ball.” The bladder is a loose rubber sack inside the stitched casing. If you force air in too fast, the bladder can inflate unevenly and get pinched or folded against the inside of the ball’s shell. The symptom is a ball that doesn’t roll or spin true, it wobbles. You can sometimes free it by firmly rolling and kneading the ball, but prevention is simple: inflate slowly.
The second is slower and more destructive: hydrolysis. This is the chemical breakdown of the polyurethane (PU) surface from the inside out, caused by internal moisture. Where does the moisture come from? From storing a ball that’s damp from rain or dew, or, as Mitre explicitly warns against, cleaning it in a shower. The warm, damp air inside the casing attacks the material.
“Warm damp conditions are just as harmful as cold damp conditions,” notes the Mitre guide. The ball doesn’t have to be visibly wet. Condensation from temperature changes is enough.
You’ll see hydrolysis as cracking and peeling on the ball’s surface, often for no apparent reason. The damage starts inside. Mitre claims keeping balls dry “can more than double the useful life of a PU ball.” The fix is storage: always in a dry, airy place at normal room temperature. Never in a damp kit bag, a cold garage, or a hot car trunk.
Storing Your Football: It’s Not Just About Space
You’ve pumped it right. Now you need to store it right. The consensus is clear: reduce the pressure. But by how much?
- Mitre: “Store the ball at reduced pressure.”
- Sport-Thieme: “Store balls with playing pressure reduced by approx. 50%.”
- WikiHow: “Store the football in a cool, dry place.”
The 50% figure from Sport-Thieme is the most actionable. Deflating it halfway relieves constant tension on the stitches, panels, and bladder. Think of it like taking weight off a spring. A ball left at full pressure for months on end will slowly lose its perfect roundness as the materials fatigue.
The environment matters as much as the pressure. “Dry, airy place at normal room temperature,” as Mitre puts it, fights hydrolysis. A mesh bag is ideal for storage, it allows air circulation on all sides. A sealed plastic tub or a pile in a damp corner of a shed is the worst choice.
And a direct warning: never dry a wet ball on or near a heater. The intense, localized heat can warp panels and weaken glue bonds. Wipe it with a damp cloth, clean the seams with a soft brush, and let it air-dry at room temperature.
Types of pumps (hand, electric, stirrup)
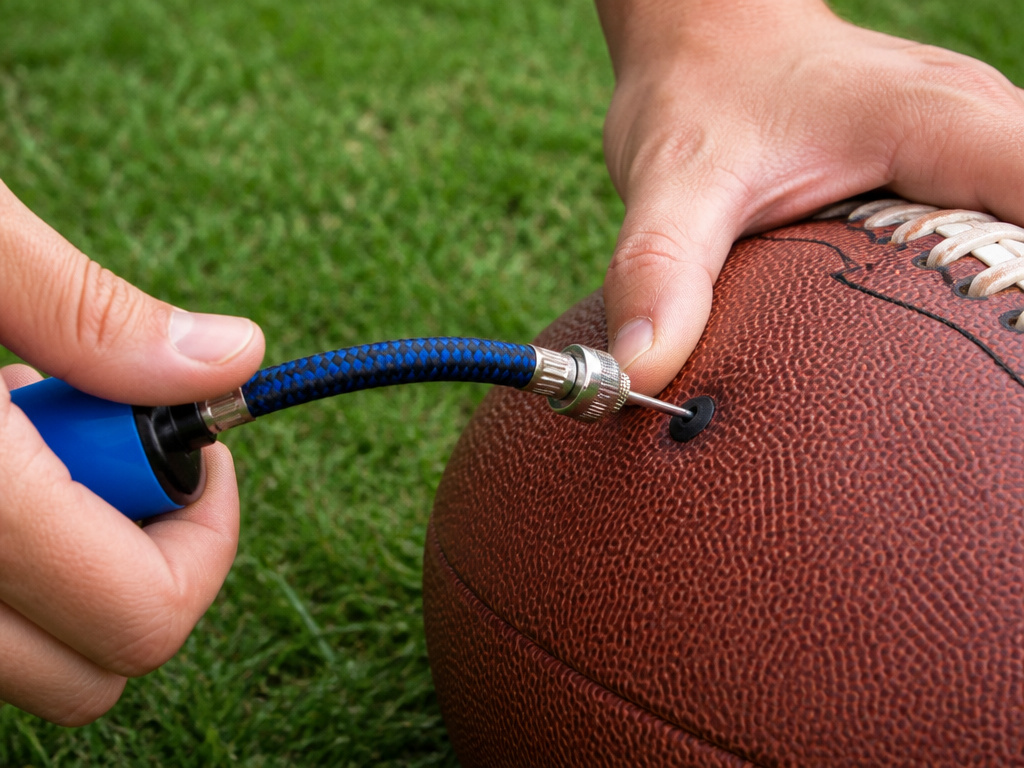
You can use a hand pump, an electric pump, or a stirrup pump. The key is to use the correct inflation needle with it; there are different types of valve needles. To protect the needle from bending or breaking, connect it to the pump using a flexible hose. Regardless of the pump type, always inflate slowly. Rapid inflation can trap the bladder inside the ball and prevents it from taking its proper shape. Inflate in short bursts and check the pressure frequently with a gauge to avoid over-inflation, which can make the ball oval.
Frequently Asked Questions
Can I use a bike pump to inflate a football?
You can, but not directly. You need a separate football inflation needle that can attach to your pump’s nozzle, often via a small adapter. The standard bike pump nozzle is too wide and will damage the football’s valve. It’s easier to use a dedicated ball pump.
What can I use if I don’t have needle lubricant?
Water is the most accessible alternative. Dipping the needle in water provides enough temporary lubrication for a single insertion to reduce valve wear. For long-term care, a small bottle of silicone-based valve oil is a cheap and reliable investment.
How do I know if my football is over-inflated?
The best way is to use a pressure gauge. Without one, the bounce test is a rough guide: drop the ball from shoulder height onto a hard, flat surface. It should rebound back to about waist height. If it springs back to your chest or higher, it’s likely over-inflated. A rock-hard feel is also a telltale sign.
Why does my new ball need 24 hours to settle after inflation?
The bladder and the outer casing need time to stretch and align under pressure. Inflating and immediately using the ball can cause the bladder to settle unevenly, potentially leading to a trapped bladder or a slight dead spot. Letting it sit ensures a consistent, true shape and feel.
Is it okay to leave a football inflated in the car?
No. Temperature extremes are a ball’s enemy. A hot car will cause the air inside to expand, potentially over-inflating the ball to the point of damaging the bladder or seams. A cold car makes the materials brittle. Always store it at room temperature.
Before You Go
The single most useful thing you can do today is find the pressure gauge. If your pump doesn’t have one built in, get a separate low-pressure gauge. Guessing is what ruins balls and ruins touch. Every other tip, the lubricant, the slow pumping, the 24-hour settle, builds on that one accurate measurement.
For long-term care, remember the 50% rule. When you’re done for the season, let half the air out before you put the ball away. It’s the simplest form of maintenance, and it directly counters the internal stresses that cause premature aging. Everything else is just keeping it clean and dry.
That’s the thing about a football, it’s not just an object. It’s a system of air, rubber, and stitching. Look after that system, and it will pay you back with a truer flight and a softer touch for years. Neglect one part, and the whole performance drops. Start with the pressure. The rest follows.
